Tilting at wind mills

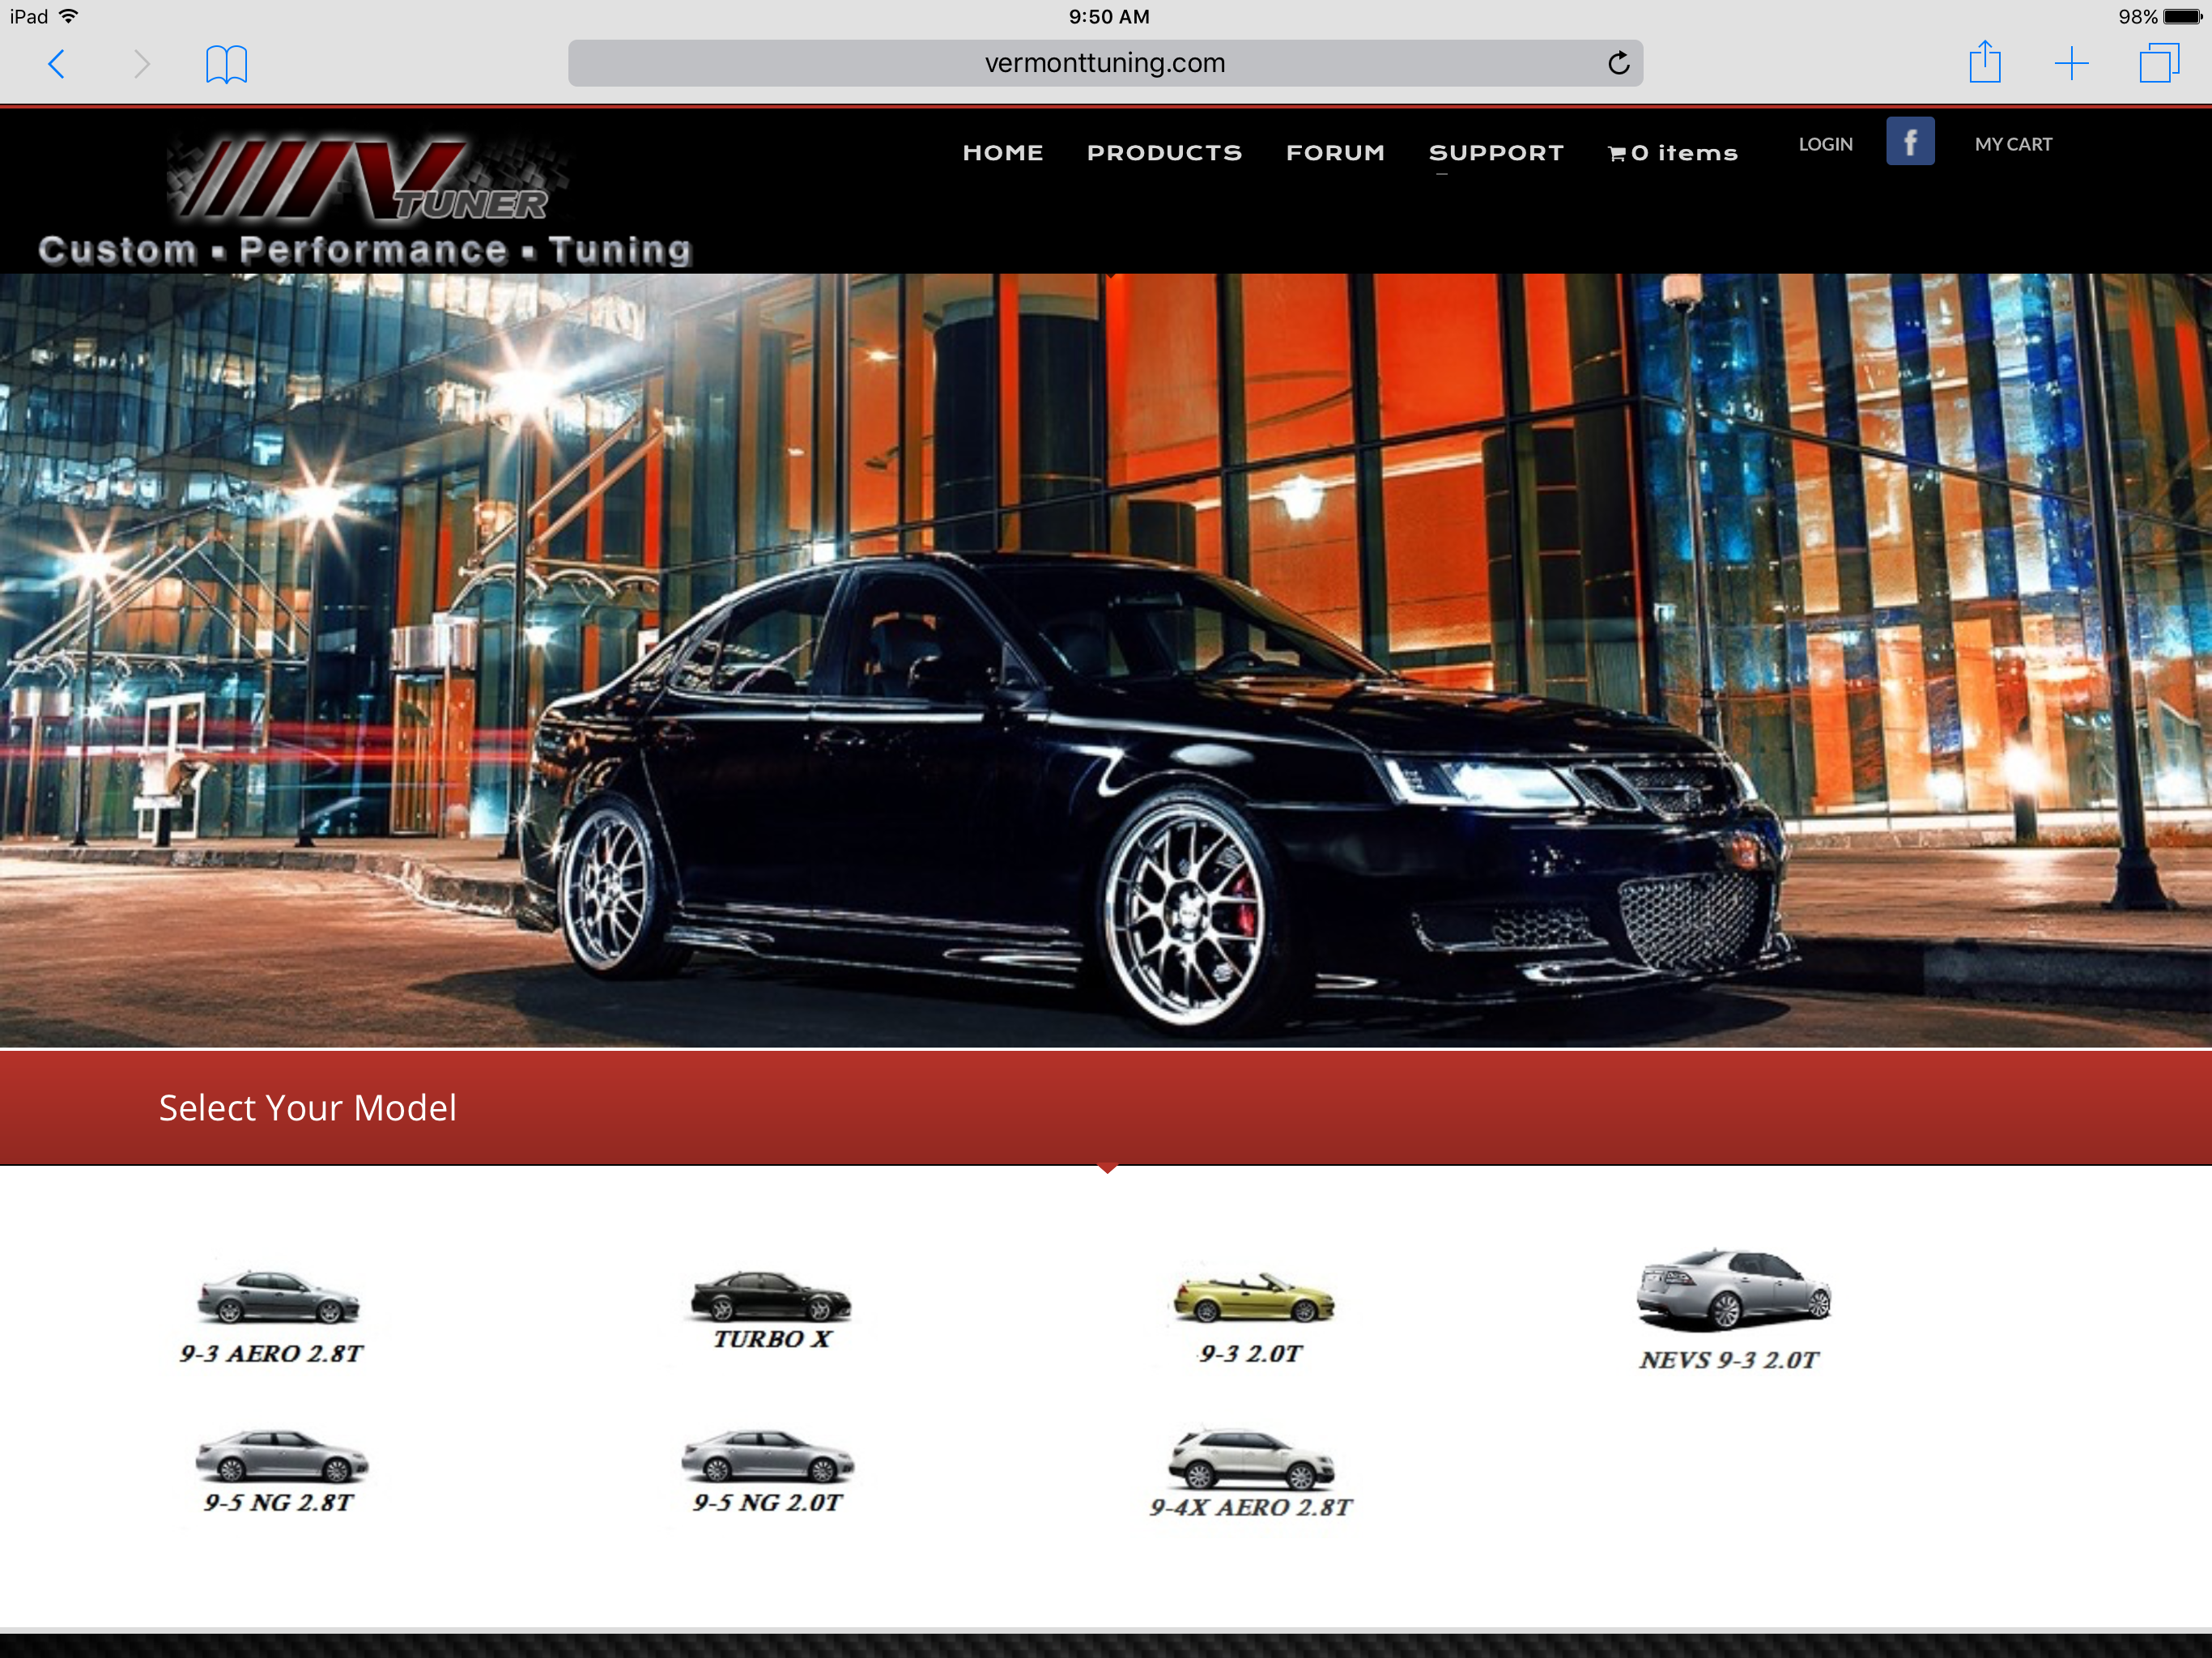
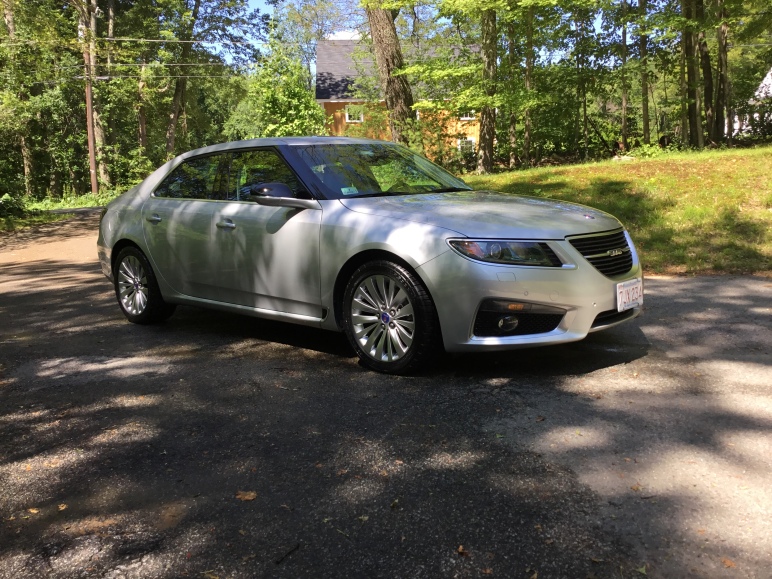
So after adding a little more power to my NG 9-5 Aero by way of a tune from Vermont Tuning (from 300 HP to 330 HP), I figured if a little is good, more *must* be better? After all, how hard could it be…? I began my crusade much like the fabled Don Quixote, who was determined revive chivalry and serve his nation. I was equally determined to get my portly sports sedan to perform like a younger, fitter, version of itself!
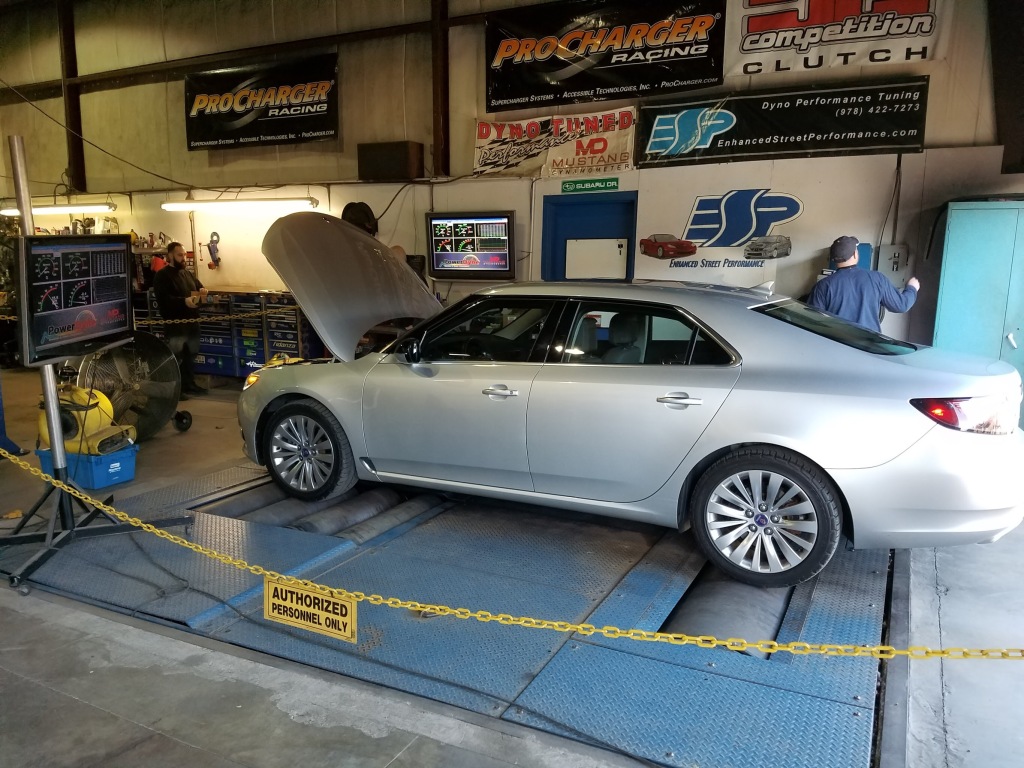
After my trip to the dyno, one thing that stuck out was the scorching high Intake Air Temps (“IAT”) and the accompanying very rich Air Fuel Ratio that was the result of the car trying to protect the engine and catalytic converters. Getting the IAT down is a common theme for all boosted motors. While there are vendors that do provide upgraded intercoolers for Saabs, and even Saab 2.8 V6 motors, they are all for the 9-3 and not the NG 9-5. So I figured on doing a custom intercooler setup. And in typical Josh-fashion, I decided to just start taking things apart… Now, I know what you’re thinking: “This will be a trainwreck of epic proportions…”, but you don’t know that! This could be great! Maybe…?
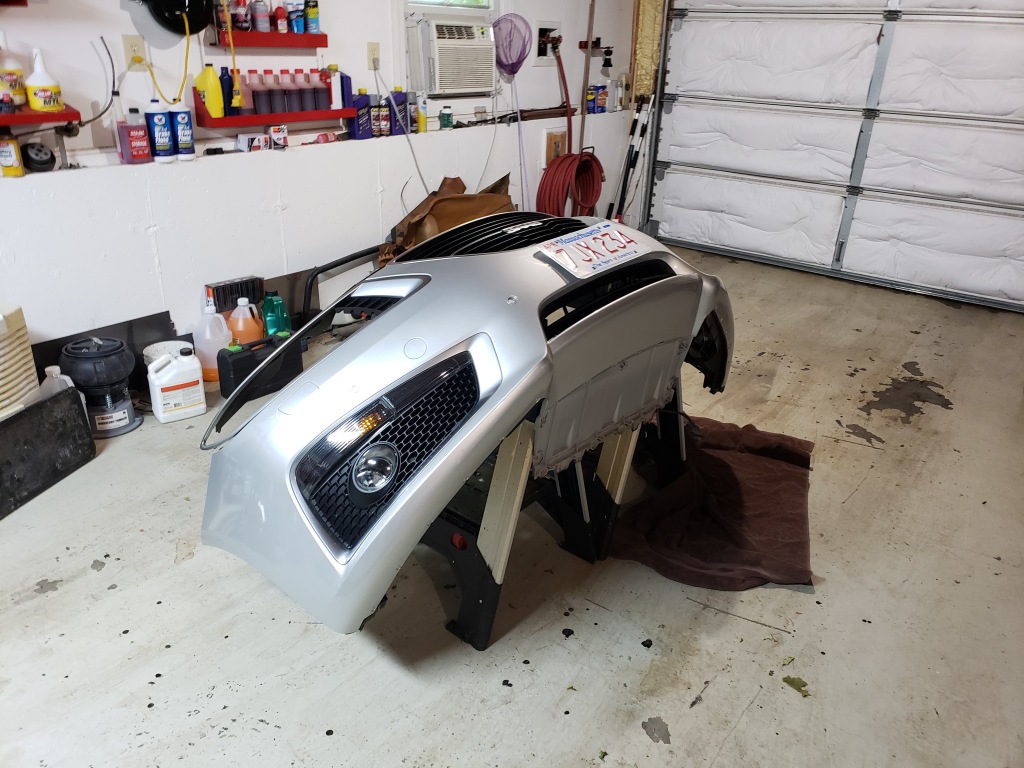
First up was to pop off the front bumper cover. What appears to be a big bottle brush is actually your power steering cooler. It doesn’t look terribly effective, so that could be a candidate for an upgrade. So that got drained down and moved out of the way. Next up was to pop out the old intercooler, but a small catch: it’s actually sandwiched in between a very hot radiator and the also not-cold A/C condenser, so no surprise that the IAT were so high. I disconnected the air plumbing that comes from the turbo, then the other side that feeds the motor. Surprisingly, there was a fair amount oil residue in the piping, so perhaps a catch can is in order down the road.
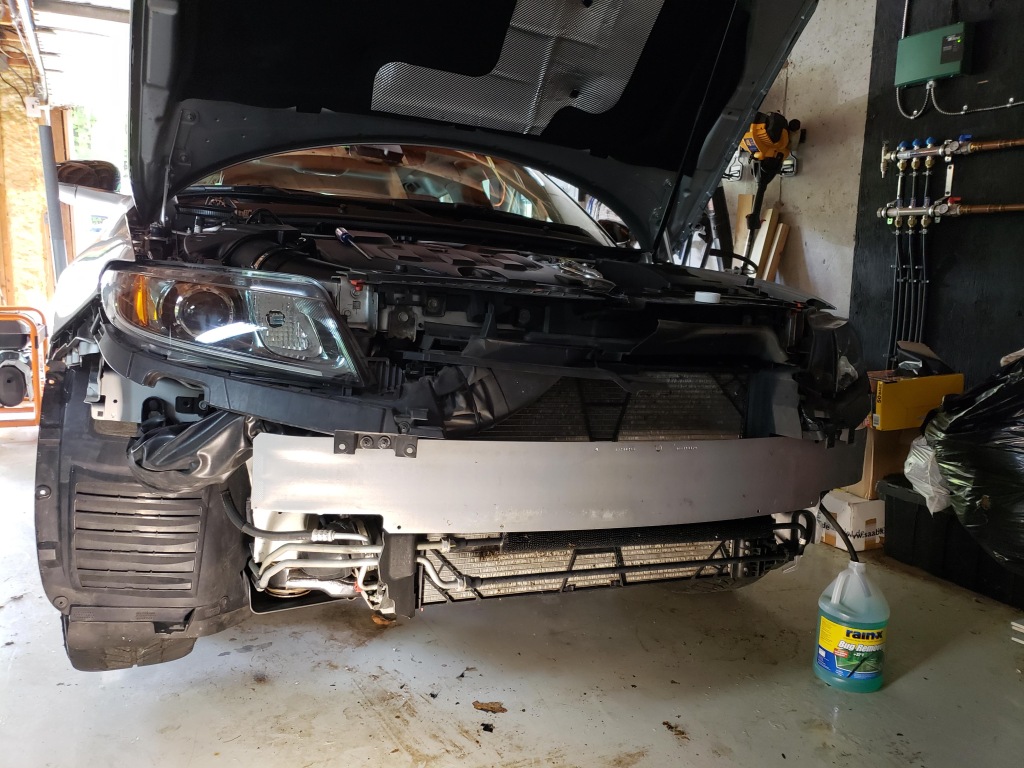
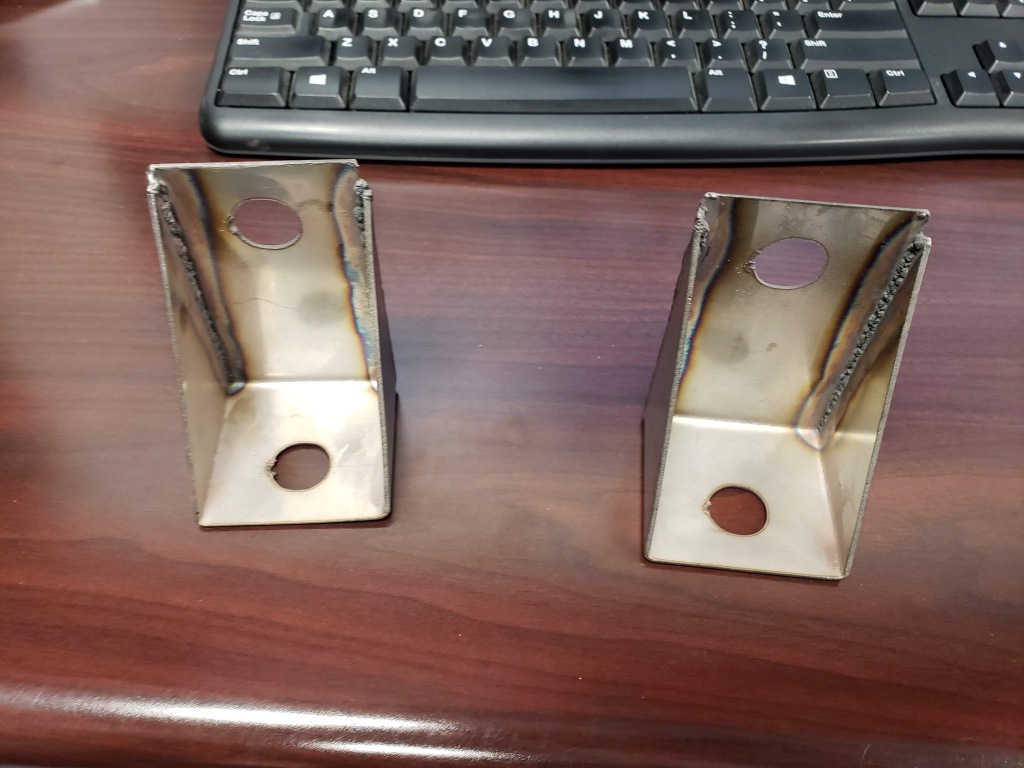
Since there were no off-the-shelf options, I started looking around at intercoolers and decided on the Mishimoto J-Line universal unit. Supposedly one of these intercoolers were in operation on a 500 HP car of another make, and it looked like I could fit it up in place of the existing power steering cooler that would need to be relocated. When the Mishimoto arrived, I mocked it up into place but still needed a way to secure it. My brother Jake came to the rescue with a design for some stainless sheetmetal that could be cut out, bent, and welded up into a beefy bracket. My workplace was then recommissioned from actually making us money, into parts fabrication for yet another Saab in my stable. Thankfully my boss does not read this blog…! The finished mounts were exactly what was needed, and I was able to hang the intercooler off the back side of the crash bar. I was able to source some silicone hoses to adapt the new intercooler to the existing hoses.
Next up is the biggest disaster since the Exxon Valdez… (I KNOW, YOU SAID THIS WOULD BE A TRAINWRECK, I GET IT!). The intercooler was actually not a bad project. Where things went sideways, was…the power steering. Yep, a mundane upgrade made this one of the worst projects of all time. I started with an off the shelf power steering cooler upgrade. I found a spot to hang the cooler, used the provided hoses to connect to the factory lines (that I had cut), and filled the system. I finished putting the car back together and started it up. I then went to back the car out of my garage for a test drive, and… oil slick! Power steering fluid everywhere! The hoses had popped off the OEM lines….
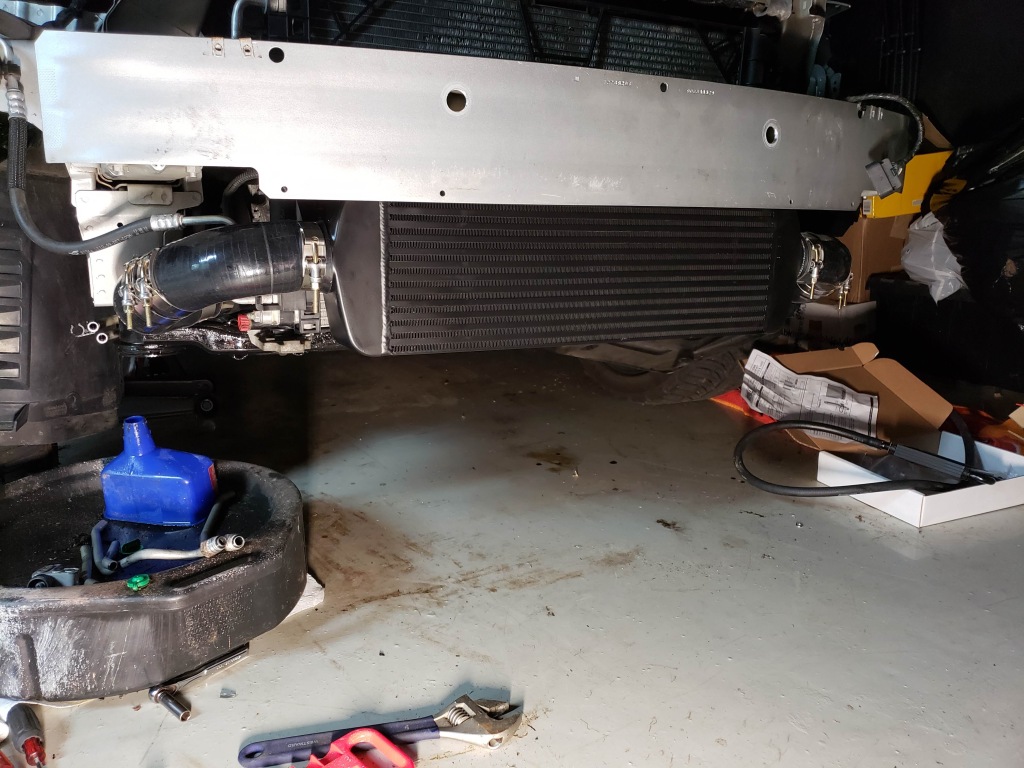
So I took the front bumper cover off, and bought new hoses and better quality clamps. I put everything back together…and oil slick #2…!?! After seeing that the hoses wouldn’t stay on the OEM lines, I decided to beef it up by getting 3000+ PSI adapters for the OEM lines that would allow me to push the hoses onto an actual hose barb, and then I hooked the hoses up to that. I refilled everything and fired up the car… oil slick #3… Unf#$%king real!?!

I sourced a high pressure oil cooler used in Mustang Cobras that race on road courses, all TIG welded. I then took my heavy-duty adapters, added 2500 PSI Teflon hoses up to the cooler. This time I had it for sure! I refilled the system, and had my wife turn the wheels while I watched, and… the new oil cooler blew out, spraying power steering fluid into oil slick #4… You literally cannot make this up… I decided to let the car sit (after cleaning up yet another round of power steering fluid) and did some homework on the OEM power steering system design. After pulling the factory schematics and following all of the lines, it hit me: this system was 180 degrees different from every other power steering system I had ever seen. Instead of cooling the fluid on the return (after the high pressure was used by the power steering rack), the NG 9-5 cooled the fluid on the SUPPLY side feeding the rack!?! No off the shelf cooler would cut it at these pressures (around 2000 PSI). I’ve never seen a car (or truck) operate a power steering cooler setup like that. And, given that most cars now have electric power steering, we probably never will again.
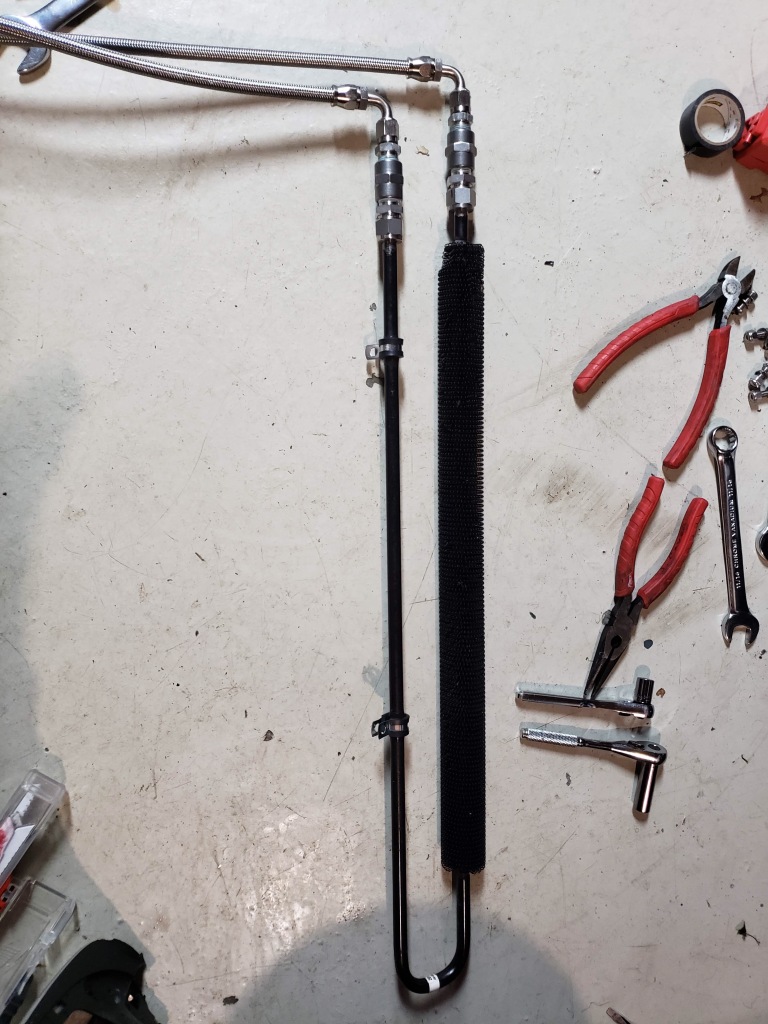
So, I dug back into the Grainger catalog yet again, and bought some more 3000# adapters (only $50.00 per fitting…lol). After all of this messing around, I ended up reinstalling the OEM cooler… What a mess of time and money wasted, not to mention absorbant shop towels… Unfortunately, like Don Quixote, I had seen my Saab’s power steering system as the way I *thought* it should be, instead of doing my typical homework first. My results were similar: he joisted against a windmill that couldn’t be defeated and I railed against a positive displacement pump that wasn’t taking no for an answer.

So, with yet another top off of the power steering system, I reassembled the car and finally took it for a test drive! Instead of IATs of 45-50 degrees over ambient temps, my IATs were now 15-20 degrees over ambient. A much needed improvement! Now if only I had something to improve my power steering induced PTSD…

Sparking it up

Well, here in Massachusetts, legislation has recently passed allowing for recreational use of marijuana.  While I am not a partaker of said substances, I felt like the timing was good enough to justify a cheesy blog title.  As they say, desperate times, desperate measures!

Since I had previously done the Vermont Tuning Stage 0 upgrade to my ’11 NG 9-5 Aero, the wife had begun “asking” when the tuner would be providing some additional zip to her beautiful (and rare) Java NG 9-5.  For recreational use only, of course!  Notice how women have a way of “asking” that really is more of an instruction?  Not that there is anything wrong with that, of course.  🙂

Not long after that discussion, the gang at NE/Saab had asked me handle setting up a group purchase with Brian at Vermont Tuning.  So, with a nice discount as incentive, I took the time to add her car to the list.  While her car is the 2.0 Turbo4 with a different ECM than my 2.8 Aero, the good news is the same EFI Live ALDL port adapter works for both cars.  So with the group purchase finalized, Brian sent me the updated info for her tune and we loaded it in.  The tune takes it from 220 HP/258 FT/LBS to 270 HP/295 FT/LBS.  Passing is much better, and the car feels like it should have come from the factory.  This really isn’t a surprise, since the Stage 0 is the same exact power rating the Buick Regal GS and Cadillac ATS had, so the hardware was obviously already capable.  But it was GM’s way of giving Saab the shaft, yet again.

Tunes are great, but if your ignition system was getting tired, you’ll know it!  The worn plugs will have their gap opened up, and misfires are the result.  Do it long enough and you can smoke the coil packs too.  Your car will go from inspired motivation to the equivalent get-up-and-go of your local hippie after a few bong hits… not really what we’re looking for here.  So I decided to proactively tackle the plugs before loading in the tune.  Brian suggested the NGK Iridium IX model LTR5IX-11 gapped around 0.80 to 0.85mm (0.032 to 0.0335 inch) and they were pretty close to that out of the box.
I took the time to carefully clean up the coil packs to look for any cracks or breaks.  I’m told you can’t grow recreational crops with bad lighting, and you can’t make horsepower with bad ignition!  I torqued the plugs in to the factory spec of 15 ft/lbs on all four plugs (you use a torque wrench too, right…?) and put a little dielectric grease on the coil pack seating points to help prevent moisture incursion and facilitate easy future removal.


Lastly, in the words of Jeremy Clarkson:  “Looking good is more important than looking where you’re going!”.  With that in mind, I decided to do a good cleanup on the Turbo4 engine bay.  Looking good and running even better… but why do I have the urge for a big bag of Cheetos all of a sudden…?

Saab Events Fall 2017

So, after buying the 9-5 NG Aero in June 2017 and then buying the 9-5 NG Turbo4 Premium for Mrs. Sonett shortly thereafter, I kind of got a late start to joining the summer/fall party that is the Saab scene.  I’ve never been one to join in this kind of stuff in the past, but my fellow Saab owners have been pretty encouraging about getting out there and having some fun.

With the recently installed VTuner “Stage 0” program into the Aero, the first trip with the New England Saabs gang (www.nesaab.com) was a venture up to a car show in Montpelier, VT.   Up early on 9/23/17 I drove alone through the back woods of Northern MA and Southern NH (using “Sport” mode of course!) to the first checkpoint to meet up with a half dozen fellow NE Saabers.  Sport mode puts the Aero’s “DriveSense” suspension in position to keep the big 9-5 in line, making it handle like a car a thousand pounds lighter.  It’s uncanny!

In Keene, NH we got the first group of the convoy together, including a heavily modded Viggen, an equally heavily modded 9000, a tuned 9-3 SportCombi Aero 2.8, and a few others to boot.  After seeing some of the other cars that I was cruising up with, the new goal wasn’t to make it to VT.  It was to make it without a large speeding ticket or a night in jail!!  We began riding up towards VT where we picked up Interstate 91 North.   Due to the advice of my attorney, I will not publish what speeds we drove… just to say that “we arrived expeditiously and safely…”!

At that point we joined up with another half dozen Saabs and we all cruised up to the Crossway Auto event.  Upon arrival, I pulled up and was greeted by a young lady who told me to take a spot in the show line.  I told her I was just checking out the show and not planning to show my car.  Her words were something to the effect of:  “Are you crazy?  Show your car!”.  So I took my spot in the lineup and hurriedly bought some detailing supplies from Crossway and wiped off the 3,000,000 bugs I had killed on my trip off the front end!  The show went off without a hitch and there a ton of great Saabs, including a beautiful & pristine ’59 93B… that unfortunately a video-recording drone crash nearly took it out!!!  Everyone breathed a sigh of relief when it ended up being a miss…but WAY too close for comfort.  Also in attendance were some nice 9-3’s and OG 9-5’s, and my buddy Roger’s well kept ’71 96 too.

One great event under the belt, I was ready for more!  This time Mrs. Sonett joined me in the NE Saab cruise up Mount Washington.  For those of you who don’t know, Mt. Washington is the tallest point in New England, and holder of the coldest weather in the continental US.  During the recent winter, while we were at -15 F in Central Massachusetts, the top of Mt Washington was -90 F with wind chill!  It’s incredibly tall, and the very narrow and very winding road is not to be taken for granted.  The warning signs all over the road about overheated brakes was a stark warning for underprepared cars!

Thankfully, we could not have picked a nicer day!  Literally perfect, 70 degrees and sunny.  We even got to follow a Lamborghini Gallardo to the summit!   We gathered at the base of the mounted with the rest of our crew and began the trek up.  It was steep and slow going, with no guardrails in most sections.  If you screw up, you’re done…  But the climb was well worth it, and we proceeded to get some great shots at the top, where you can see for miles on end.  We only had one breakdown, with an OG 9-5 blowing off some steam from the radiator.  It wasn’t a total failure thankfully, and by leaving it in a parking area halfway up, we were able to get him underway on the way back down so that he could limp it home.  Thankfully, I had packed extra tools and automotive fluids in the gigantic trunk of my 9-5 before the trip, because Saab!  I had a funny feeling someone would need it, thankfully it wasn’t me…

On a humorous note, when we got to the top a bunch of us V6 guys popped the hoods on our rides to help with the cool down of our overpacked engine compartments.  While we all walked away, Mrs. Sonett kept taking pictures.  To her amusement, a random motorist got out of his car upon reaching the top, saw our cars all lined up with the hoods up, and with a chuckle to himself proceeded to pop the hood too… on his Prius!?!  Maybe he was worried about his batteries overheating…?

With winter approaching, we got in one more outing before the snow hit.  The local Volvo club put on a dyno day at Enhanced Street Performance in Sterling, MA to which local Saabs were also invited.  I was one of only a couple of Saabs to show up, versus a whole fleet of Volvos…  could Saab hold off the wolves?!?  Local NE Saab admin Lucas came and hung out with me to provide moral support (which I definitely appreciated)!  ESP has a “Mustang” dyno, which is known in local circles as a “heartbreaker” since the numbers are normally far less than a typical Dynojet unit.  With 300 HP stock, fellow NG 9-5 owners have reported about 230 HP to the wheels using the Mustang dyno.  It’s obvious the XWD system saps a LOT of power… to the tune of 23-24% drivetrain loss on a Mustang dyno!  If you know musclecars, you know that is unheard of.  Most cars are 15% to 18%, with “extreme” examples of 20%…

At the event, no one was jumping forward to go first, so I agreed to get the day going for everyone.  The Aero did not disappoint!  She put down 260 WHP (wheel horsepower) and 300 WTQ (wheel torque), so with 23% loss that is 337 HP at the flywheel (right in line with VTuner’s claim of 335 HP).  Despite just a tune and an air filter, I outdynoed many of the much-more-heavily modded turbo Volvos in attendance.  And this is with skyrocketing Intake Air Temps (IATs) that tell me the intercooler is having trouble keeping pace with the increased boost.  In 10 seconds, the IATs went from ambient to a whopping 50 degrees over ambient.  Why is that a problem?  Hot air is less dense, and has less oxygen to burn.  And in a double whammy, the hot air forces the car to dump fuel to keep detonation at bay, pushing the Air to Fuel Ratio all the way down to 10.2 on one run!?!  If you’re not up on AFR’s, that number is nearly a full 2 points richer than where we want to be.  So getting that AFR in line and getting the IATs way down gave me a goal for 2018.  After hanging out until noontime, it was obvious to Lucas and I that Saab had proudly held its own, so we went and grabbed a beer in celebration.  Let the plotting and scheming for 2018 begin!

While the Aero wasn’t the top dog, it had earned respect out of a bunch of guys who had no idea what the NG 9-5 could do.  And most importantly, it provided some direction of what to go after in 2018.   I’m not going to lie… nailing down a big dyno number is addicting!  After watching my brother burn through more cash than Hillary’s presidential campaign in his quest for 1000 HP (results soon!), I know that it’s easy to get carried away…  Which pretty much describes Saab ownership to a tee…

Turning up the heat

Driving an NG 9-5 is always a joy.  They are spacious, quiet, and tightly built.  Handling is good as well for such a big car (197″ long!).  But driving around, you always feel like you are constantly prodding the engine to get the beast to move.  The Aero version really isn’t any better in that regard.  Despite 80 more horsepower than the Turbo4 versions (300 vs. 220) the increase in weight for the bigger engine and XWD system (4300 pounds vs. 3800) pretty much nullifies a lot of the power gain.   I’ve found that the Aero will move once you put the pedal down a ways, but let’s just say I’ve been avoiding any streetlight musclecar confrontations!  So, it’s time to make a call to the boiler room and turn up the heat!  And in a Saab, that means…

IMG_1889

The good news is that there is some room for improvement, and Saab actually did some of the prep work for us!  The NG 9-5 comes from the factory with a 19T turbo (vs. 15T on past V6 versions in the 9-3s) and larger injectors, so the hardware is there to make much more than 300 horsepower.  While manufacturers have to worry about nitwits running 87 octane in a turbo car then driving aggressively (http://gmauthority.com/blog/2010/06/general-motors-recalls-2010-cadillac-srx-2-8l-turbo/), I know I’m always going to run 93 octane whenever possible.  So, with the bigger turbo, it’s just begging to turned up a bit…  Enter Brian Blair of Vermont Tuning!

IMG_1890

For $700.00, Brian offers an upgrade for the 9-5NG that takes the Aero from 300 HP and 295 ft/lbs of torque to 335 HP and 400 ft/lbs.  Now that’s more like it!  I liked how prompt Brian was in his replies, and I literally could not find anyone who was not happy with his work.  In addition, his tune looked to outperformed ones offered elsewhere.  The 9-5 NG tune he offers is considered a “Stage 0” tune, so no hardware changes are necessary at this point.  So I ordered it up and a couple of days later the programmer arrived in the mail.  This little guy lets you read and download the OEM tune by plugging into the car’s diagnostic port under the dash.  The car will make all kinds of weird noises and show all kinds of diagnostic info while this is happening, which is normal.

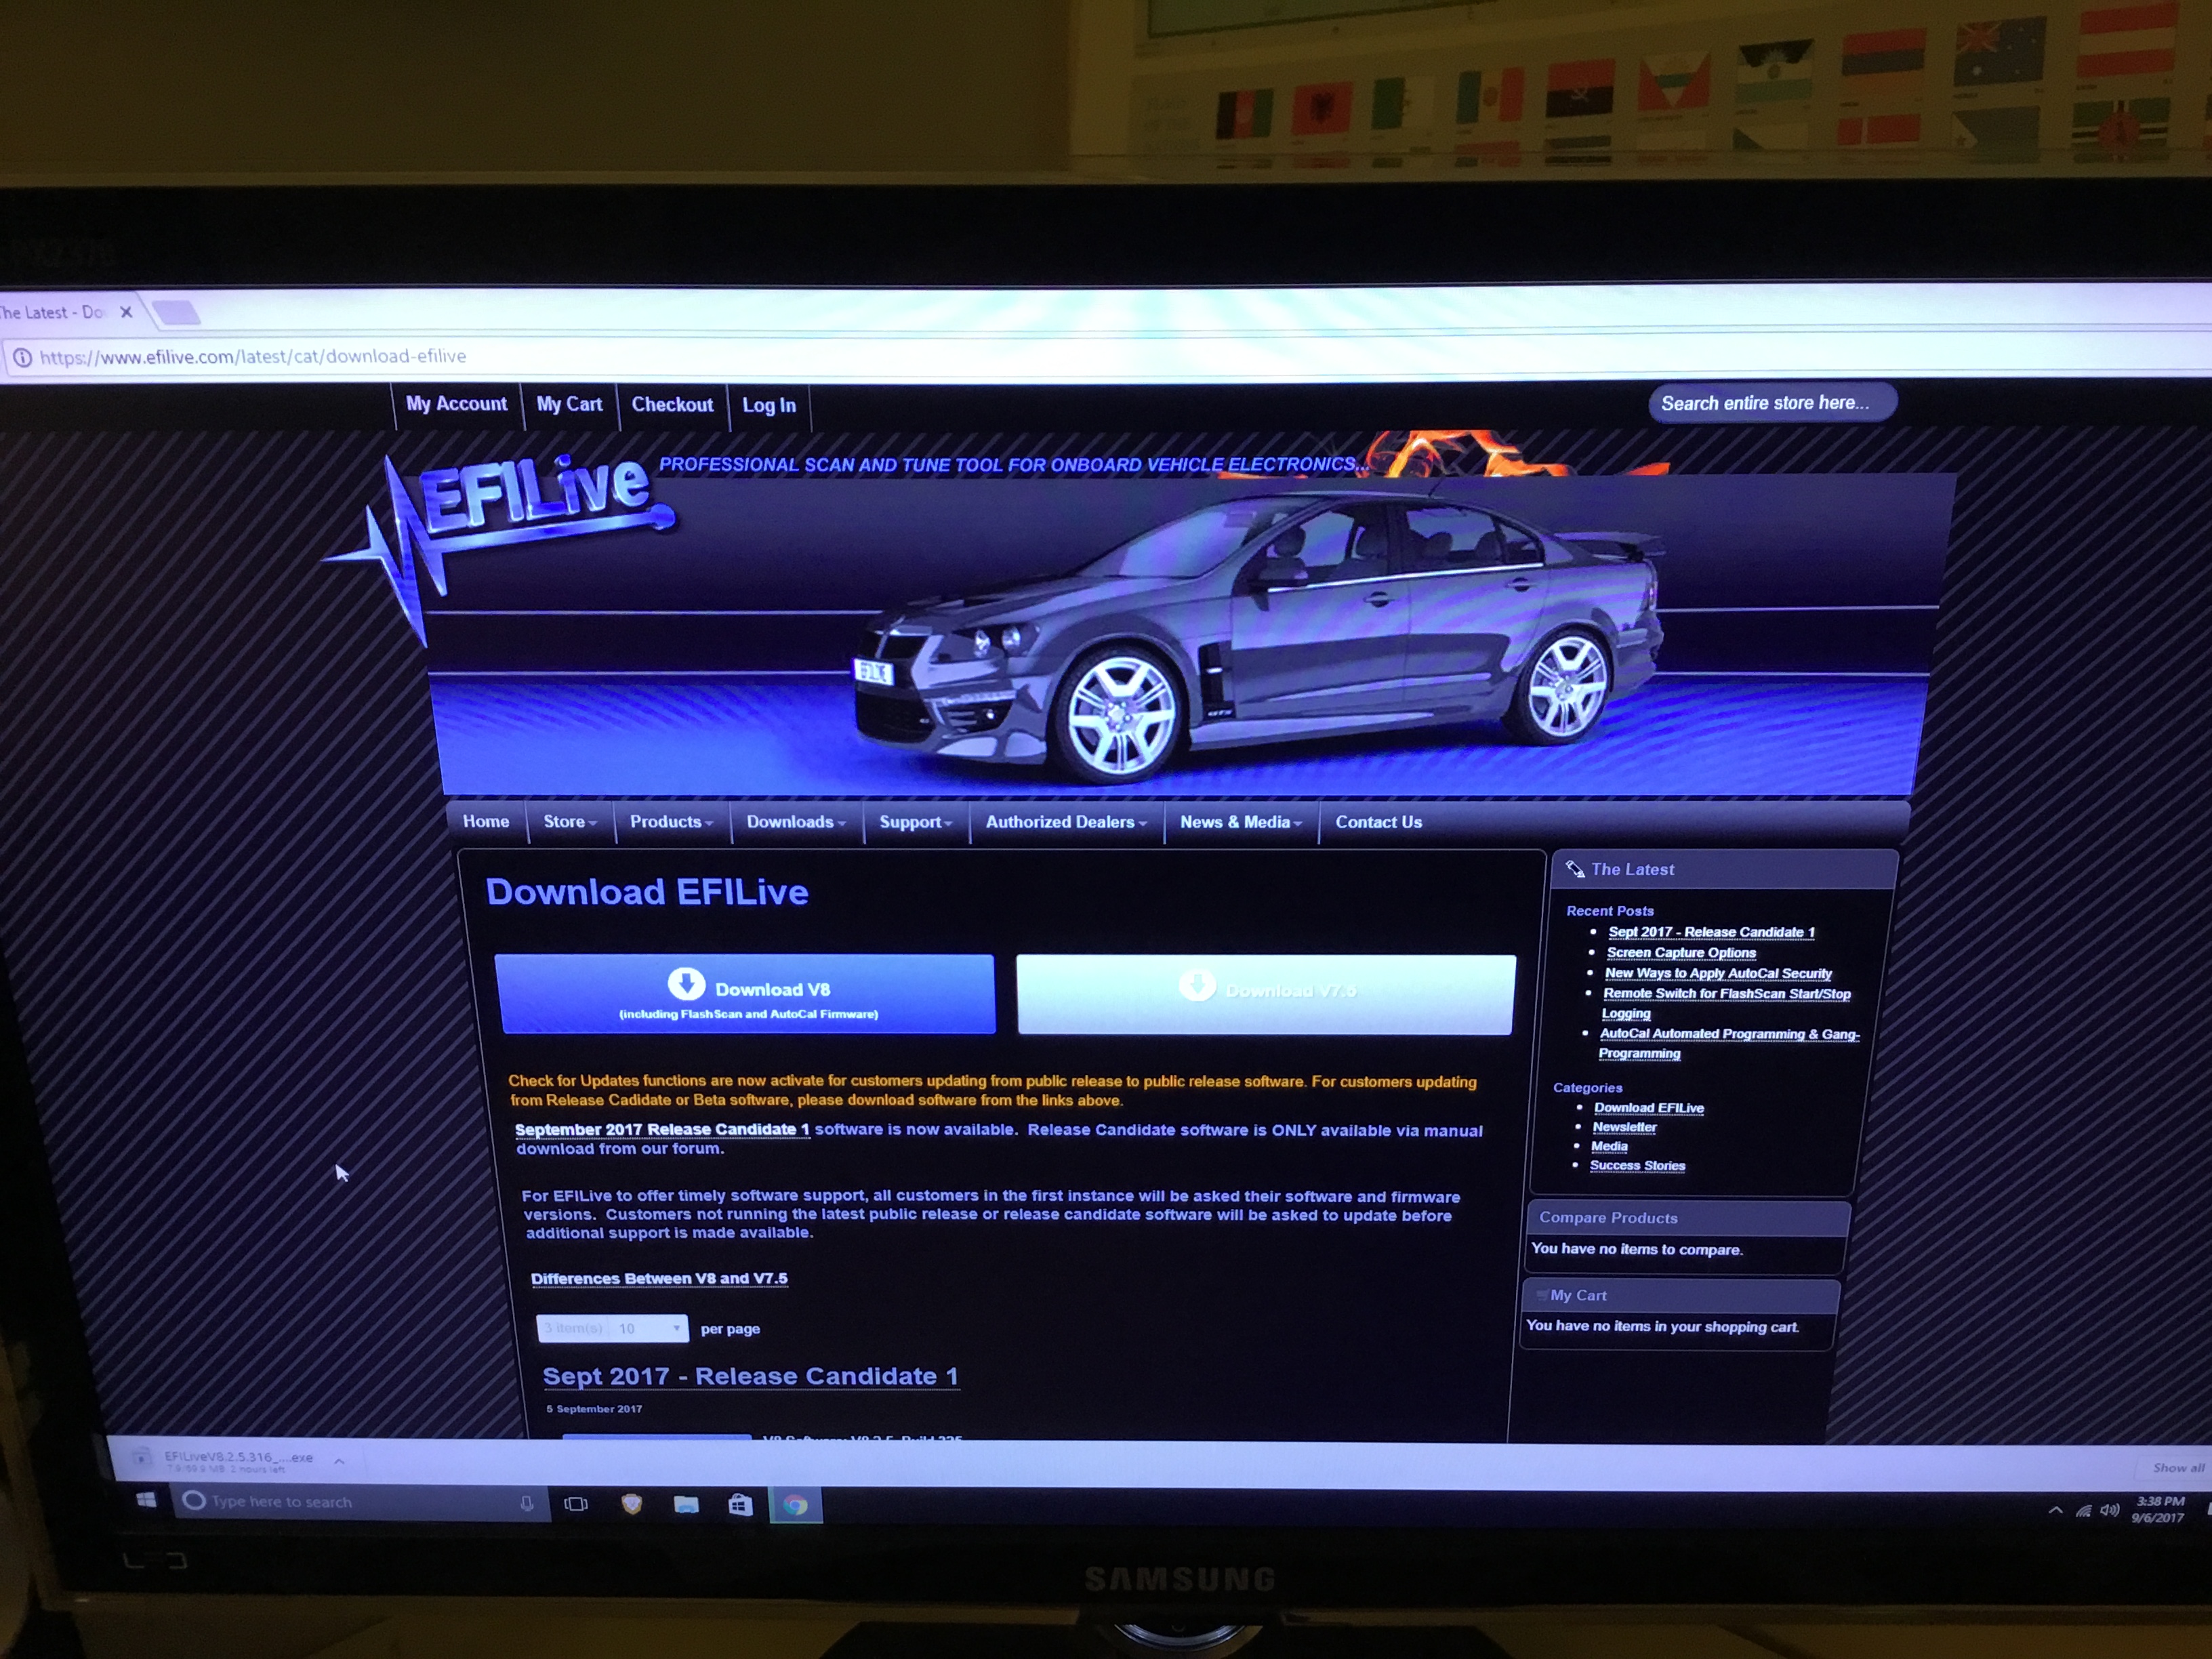
With the OEM tune downloaded, you then download EFI Live’s software for your computer.  This will let you upload and download files from the handheld unit, and be able to email them off.  Since the programmer can datalog your drives, you can email the datalogs off as well for review (which Brian offers to do at no charge, both stock and after his tune is installed).  So I sent Brian my OEM calibration, and less than 24 hours later the new Stage 0 tune was in hand.  He will give you both your stock tune and the Stage 0 tune, so you can flash either one into your car at any time.  I loaded the new Stage 0 tune onto the programmer, and flashed it into my car.

IMG_1709

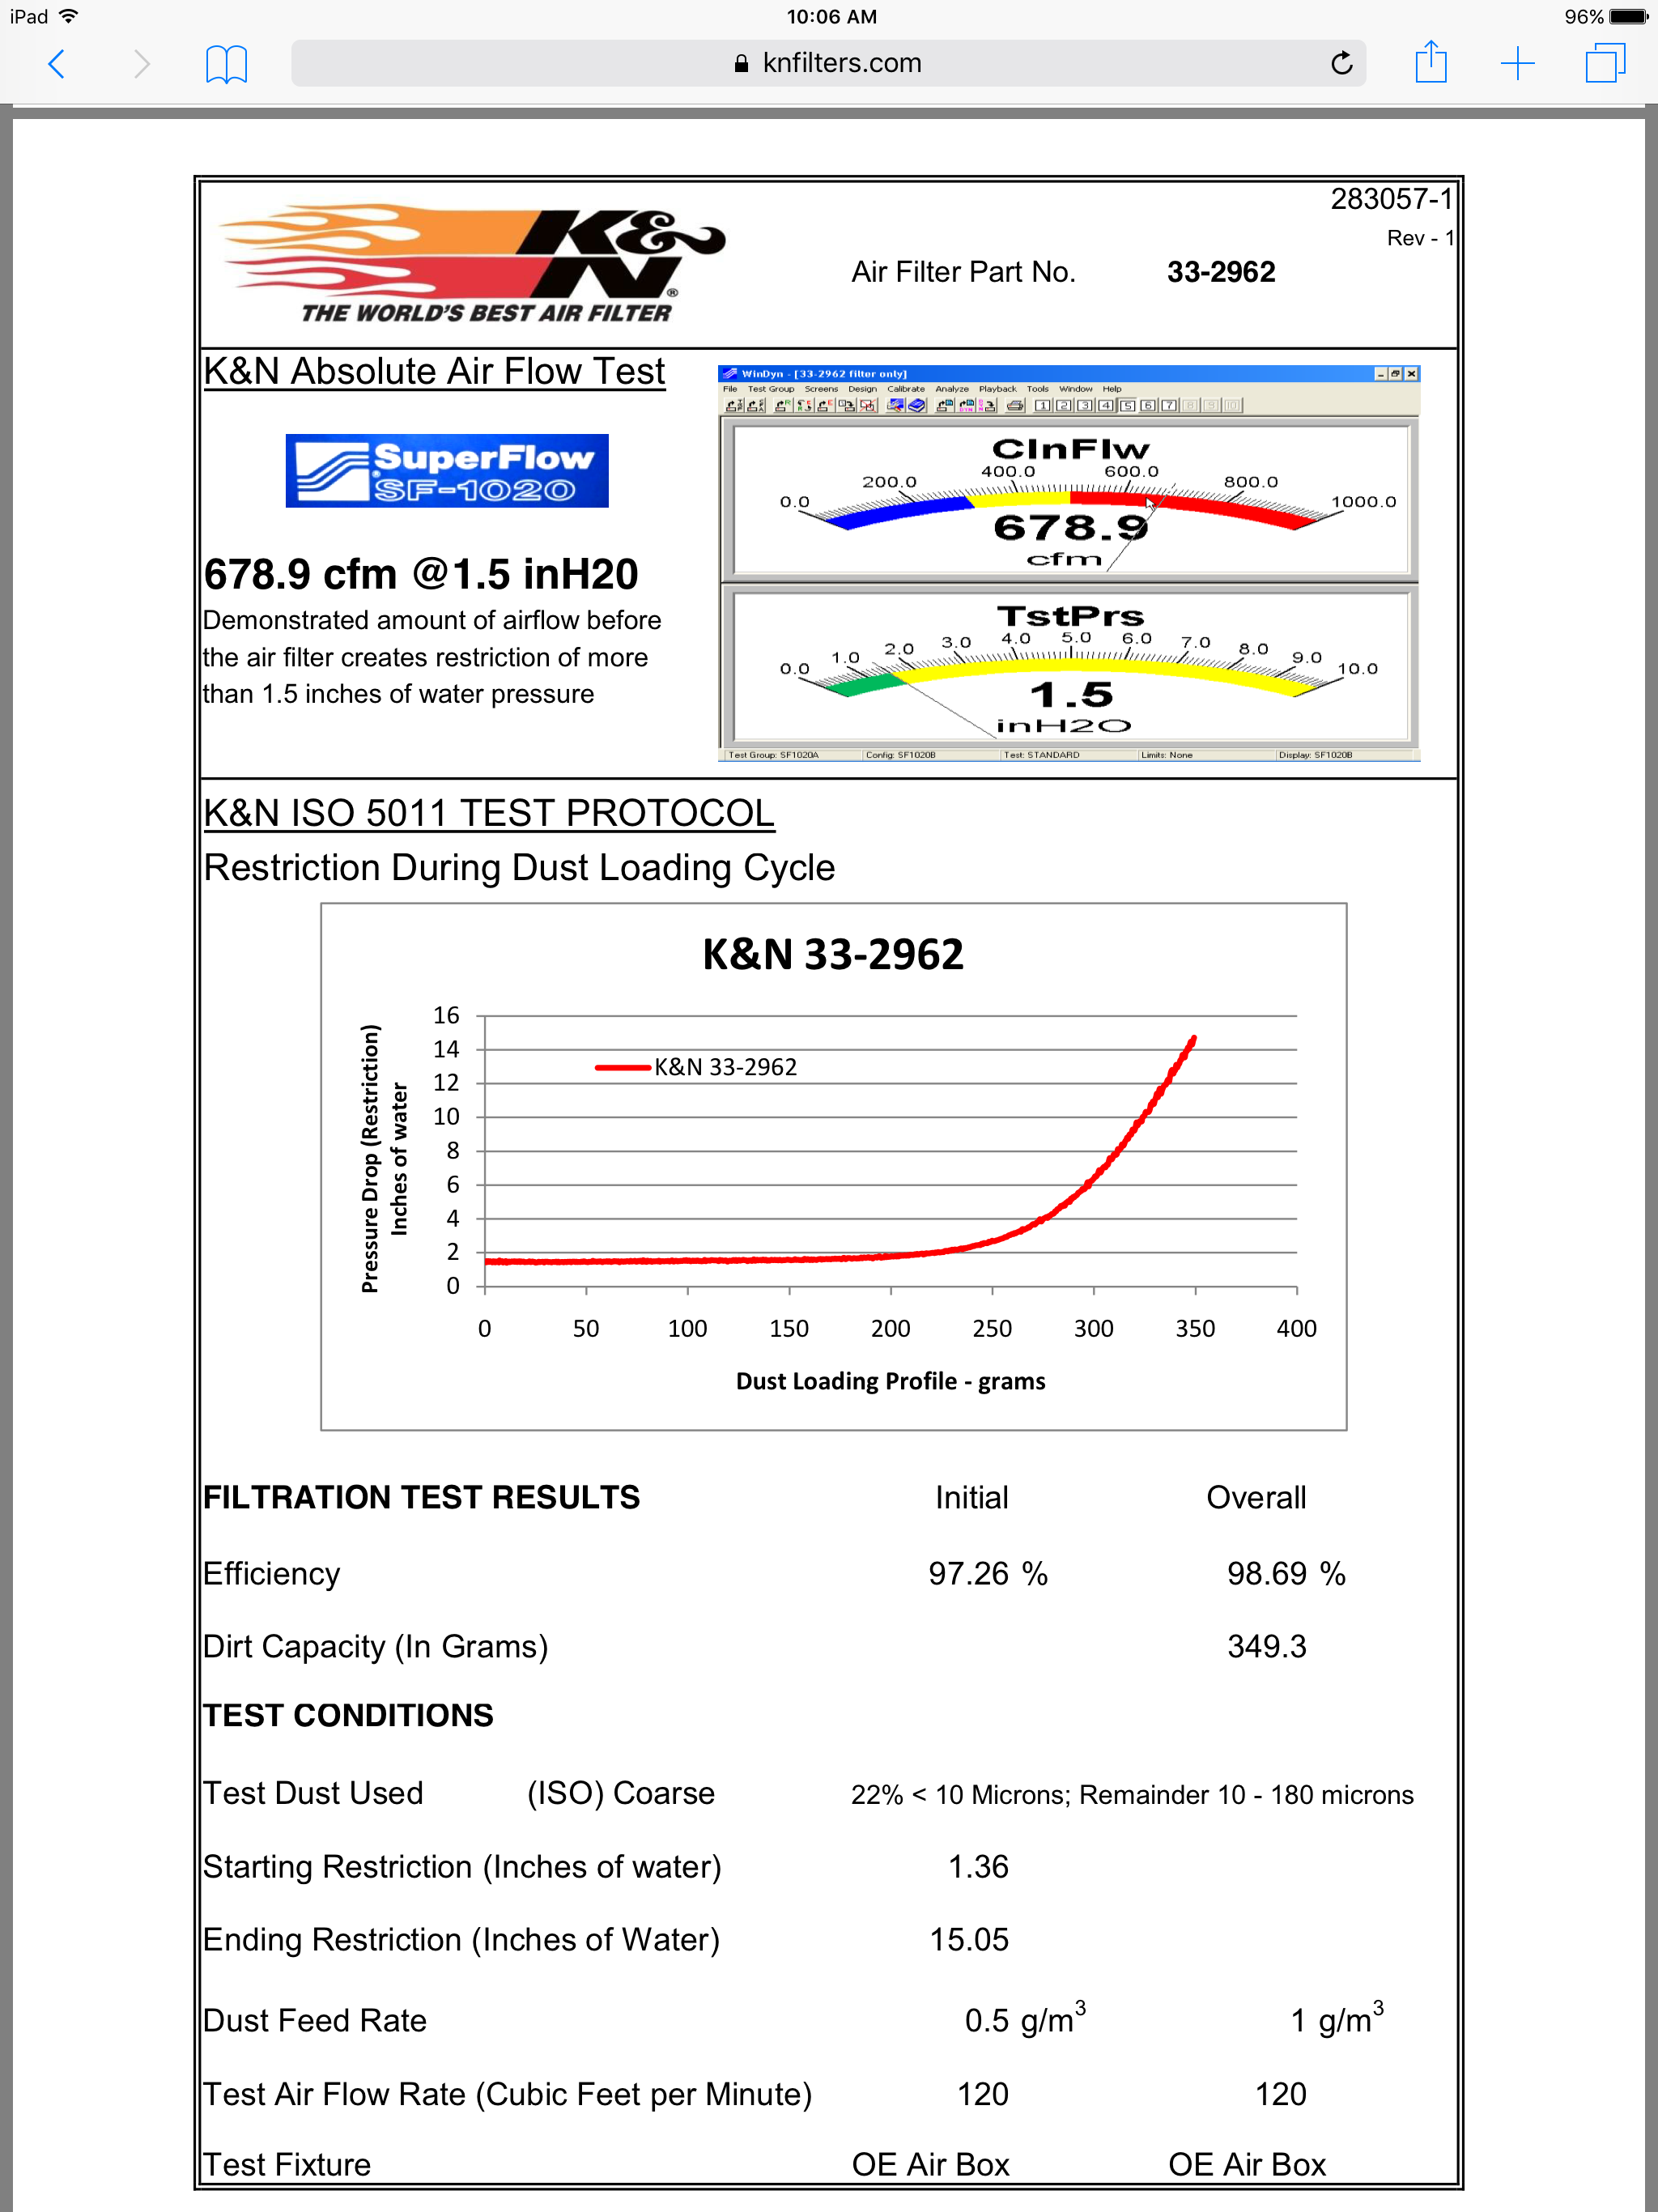
In between sending off the calibration and waiting for it to come back, I decided to upgrade the air filter.  Keep in mind that air filters will always be sized to what the OEM needs were, not necessarily what you’re shooting for horsepower-wise.  K&N makes an air filter that flows significantly more air, routinely beating paper air filters by 30% or more.  While I’ve seen guys complain that they didn’t see any horsepower gain by installing a K&N on a stock car, they’re missing the point.  Air filters don’t make horsepower, but they can restrict you in your efforts to make more.   Surfing the internet, I see “technical data” that suggests the stock air filters are not a restriction…then proceed to test at only 350 CFM.  Given that on average, you need 1.5 CFM per horsepower, 350 CFM is perfect…for your mom’s Honda Civic…  If, on the other hand, you’re interested in making more than 200 HP, read on…  The new K&N air filter for all 9-5 NG’s is part number 33-2962 (fits both 2.0 and 2.8 engines) and is flowbench tested at 678 CFM, so theoretically enough for at least 450 HP.

IMG_1891

Changing the filter itself is pretty easy, just a Torx T25 bit to loosing the cover screws.  This is also a good time to clean your mass air flow sensor with some MAF Cleaner by CRC.  The MAF has to measure how much air flow is coming into the engine, so keeping the element clean will ensure accuracy and fast reaction to changes in air flow.  CRC claims “4 to 10 horsepower at the wheels”, which would probably be versus an overly dirty MAF.  But every little bit helps.

With the new tune and K&N installed, the Aero pulls much stronger!  The car just wants to GO!  It’s still not going to set any land speed records, but the change in drivability is very welcome.  You no longer have to constantly prod the car along, it just feels much more intuitive.  Given my upcoming trip up north with a bunch of fellow NE Saab members (let’s just say they are spirited drivers), I’m hoping the big Aero can keep pace with a bunch of modded Saabs that probably weigh a solid 1000 pounds less…


Coming up in a future installment is a full on dyno test to show the effectiveness of VTuner’s upgrade!  I’ll also report back on the results of my trip up north too.  And given how crappy the stock intercooler is, unfortunately we’ll see that “turning up the heat” is a more literal statement than I was hoping for…!

Chinese Water Torture V2.0: 9-5NG lighting…

With the war on terror these days (or a back episode of 24), the occasional discussion of torture comes out.  We need something effective to get dark secrets out of bad people, so what do we do?  Light and/or sleep depravation?  Physical violence? Waterboarding?  There was always something sinister about Chinese Water Torture in my opinion, and I think I’ve proposed a new and improved version:  Saab 9-5 NG lighting!  With TWO 9-5 NG’s in our fleet now, doing anything is now times two courtesy of Mrs. Sonett’s 2011 Java Turbo4 Premium with Technology Package (to go along with my 2011 Diamond Silver Aero).

20171027_163051

I did the lightbar in my Aero back when I bought the car in June, and not surprisingly, Java needs it as well now.  My Aero had the third brake light acting up (mysteriously fixed itself?!?) and now Java has a couple of those LEDs out now.  But given how trouble prone the rear main brake lights/turn signals are, I decided to focus on those first.  The factory bulb is an H21W halogen, whose temperature closely rivals the Sun in surface temperature.  Maybe we could use them for interrogation too?  In any event, over time the bulb connection actually melts away, which causes the bulb error light to come on in the dashboard.  More often, it actually melts the bulb socket.  If the Saab gods are really in a mood, you can even melt the back of the tail light enclosure itself!  The fix is to launch the halogen bulbs for a pair of LED bulbs…which also triggers the dashboard error light… so the fix (for that fix) is to also install the proper resistor so that the computer is fooled and you can still run LED bulbs.  Just make sure the resistors are mounted to the metal body of the car, as they can get hot as well.  I used a piece of electrical tape to hold the resistors in place until the epoxy dried.  Be careful that you splice the resistors into the correct wires!  That’s kind of a big deal…  when done, your blinkers and brake lights should work with no errors on the dash.

Next up on the list was the trunk cargo area lights.  While loading up for a recent excursion with the trunk lid open for a while, I thought the lights were going to melt the plastic lens!  I went onto the Phillips lighting website (http://www.philipsautolighting.com/) and got the number for the cargo area lights (194LED by the way).  If you reach behind the lens by removing the taillight access cover, you can pop the lens forward.  Take a small screwdriver and push the old bulb out, then just push the new LED bulb in.  And…it doesn’t work?!?  Remember that LEDs are directional and only flow power in one direction, so if it doesn’t work, just flip the bulb around…back in business.  The new light is cleaner and the bulb does not get warm, which should be good for the lifespan of the OEM plastic lens.

Next up were the license plate bulbs, since those lens get yellowed and brittle over time due to the OEM bulb heat.  These bulbs are a 38mm “festoon” style bulb.  So carefully remove the phillips screws that hold the lens in (you don’t want to strip these…) and then use a small flathead screwdriver to pop the lens down.  Put in the new bulb and test the lights to make sure it’s in the right direction, then reassemble.  Again, a pretty dramatic difference.  The new LEDs are much cleaner looking and are actually the same temperature lighting (6000K) as the factory HID lights that both of our 9-5’s have.  So after finishing the Aero, I went and repeated the process with the Java too.

In the words of the infamous Ron Popeil:  “But wait, there’s more!”.  There is literally a never-ending list of lighting on these cars that need fixing and/or upgrading.  The factory daytime running lights (DRLs) are 3157 bulbs that also run nuclear.  Despite modern HID headlights, the DRLs are regular old school bulbs.  If you need proof of how hot they run, just take a look at the old bulb that came out!  I could not find a clear Philips 3157 anywhere, so I gave the Sylvania version a try.  It’s actually advertised as a great DRL replacement, and carries a Lifetime Warranty.  So just remove the circular cover on top of the headlight assembly, turn the old bulb 90 degrees, and slide it out.  Push the new bulb in and reinstall it.  The next part is easier if your partner is around.  The car needs to be in a lighted area, and gear selector in “Drive”, to get the DRLs to come on.  So Mrs. Sonett jumped in and put the car in Drive (and resisted the urge to run over me).  Side by side shows how much nicer looking the LED is!  So I did the passenger side too, and again tested it (to make sure the bulb wasn’t in backwards).  With no error lights on and everything looking good, I ordered up another set of bulbs and installed them in Java too.

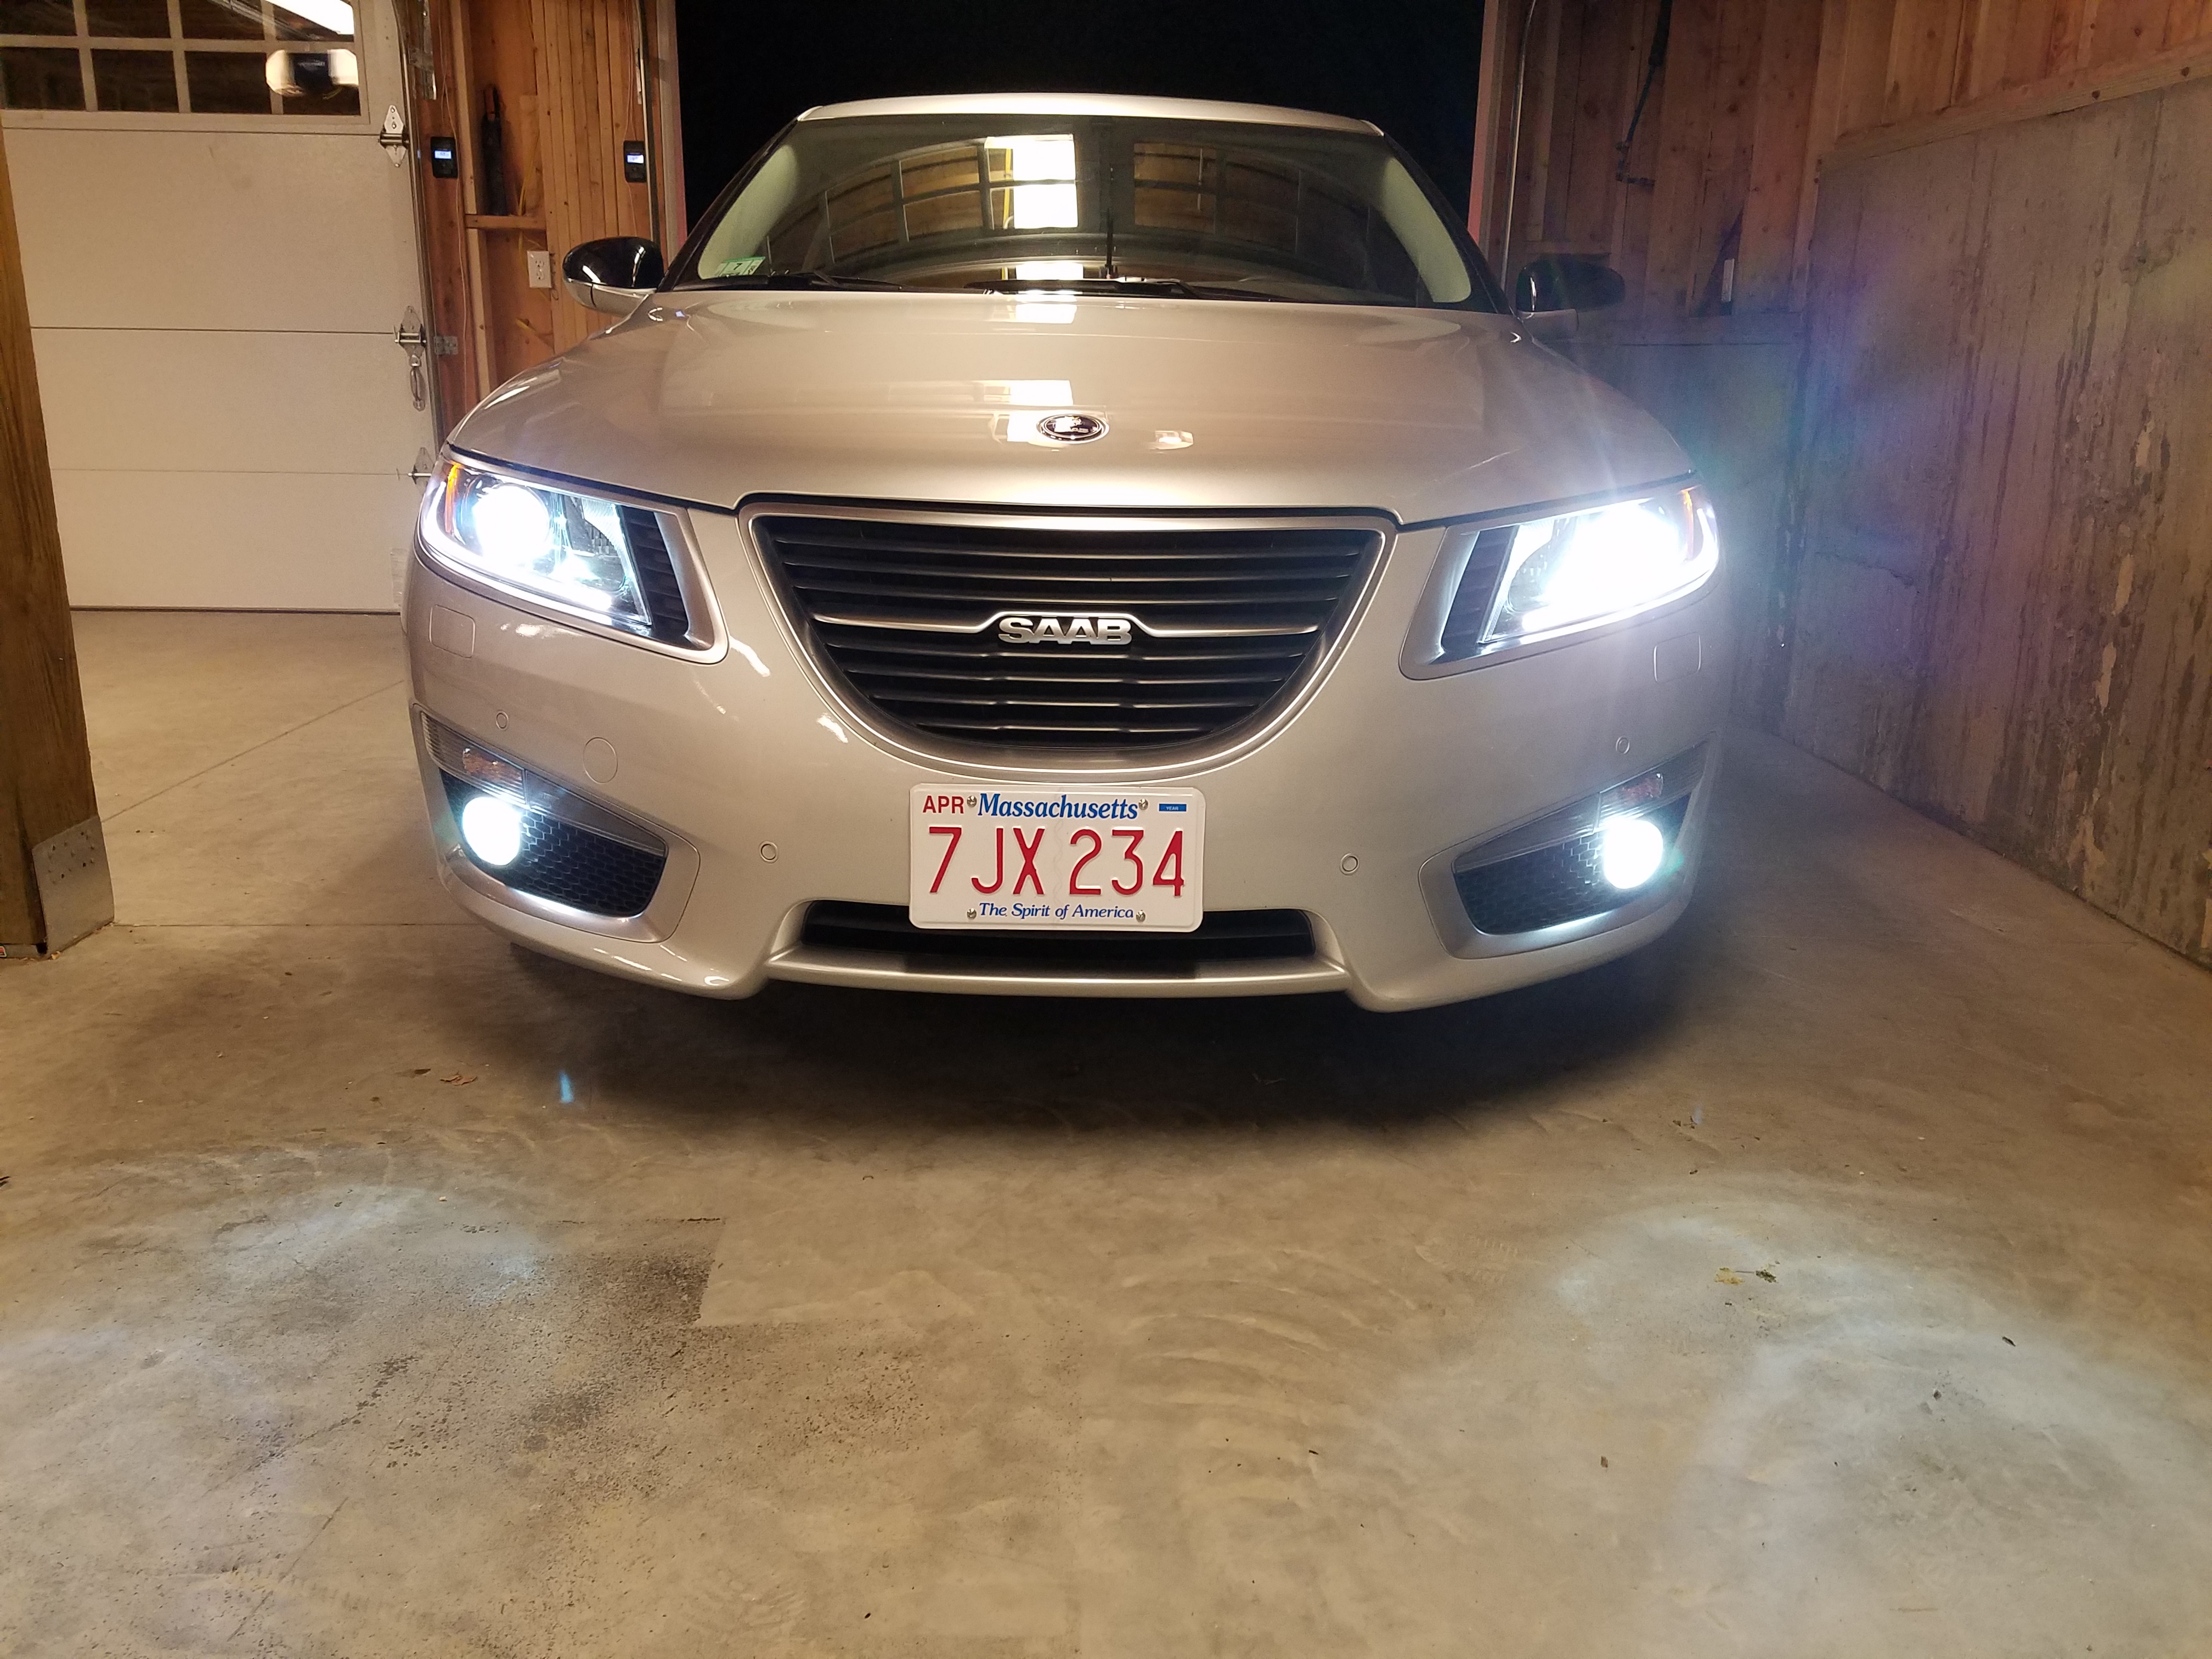
The next bulbs were a little tougher to find in a brand name, so I settled for some no-name equal.  The fog lights are a little more work, since you need to get the front end of the car up enough to take off the splash panels under the car.  That done, the OEM bulbs come out just like the DRLs, just turn 90 degrees and pull them out.  I installed the LEDs into the OEM lenses and plugged them back in.  Splash panels back on I lowered the car and tested them out.  Since these only plug in one way, you don’t have to worry about possibly installing them backwards.  The new fog lights look great!  Since these worked out well in the Aero, I’ll have to order another set for Mrs. Sonett’s 9-5.

20171106_193943

If you still haven’t had enough, you can do map lights, puddle lights, dome lights, front turn signals, etc, etc…  it’s really never-ending.  Sort of like how after a day or two of Chinese Water Torture, the victims are ready to give up and will do anything to make it stop; well, I’m really ready to be done with light bulbs!  But not before one final “ouch” to the wallet…  Given that I’ve heard stories of 9-5 NG’s being totaled by insurance companies over not being able to find a replacement taillight, I decided to take matters into my own hands before I’m the one in a pinch…  I’m not going to sugarcoat this, some of the eBay sellers are asshats.  Trying to charge $800, $900, and even $1500 for a used taillight!!!  So, I started stalking,  and keeping an eye on a couple of auctions with $800 and $900 “Buy It Now” prices.  By waiting to the last minute, I was able to grab the passenger side for $450 and the driver’s side for $550.  So, for less than what some sellers want for just one light, I was able to buy two.  They are all boxed up and safely tucked away…just in case.  Are you ready for this type of insanity?  Then you just might be ready for a 9-5 NG!  I just hope you have Jack Bauer’s resiliency to pain…!

The Devil is in the details!

I never really understood that statement.  Why is the Devil in the details?  That statement doesn’t seem accurate, since I’m pretty sure Hillary Clinton isn’t working on my Saab…  Dumb jokes aside, since picking up my ’11 Aero, there have been a few minor things that needed attention.  Getting those little things addressed means the difference between a nice car and one that “needs attention”…

IMG_1775

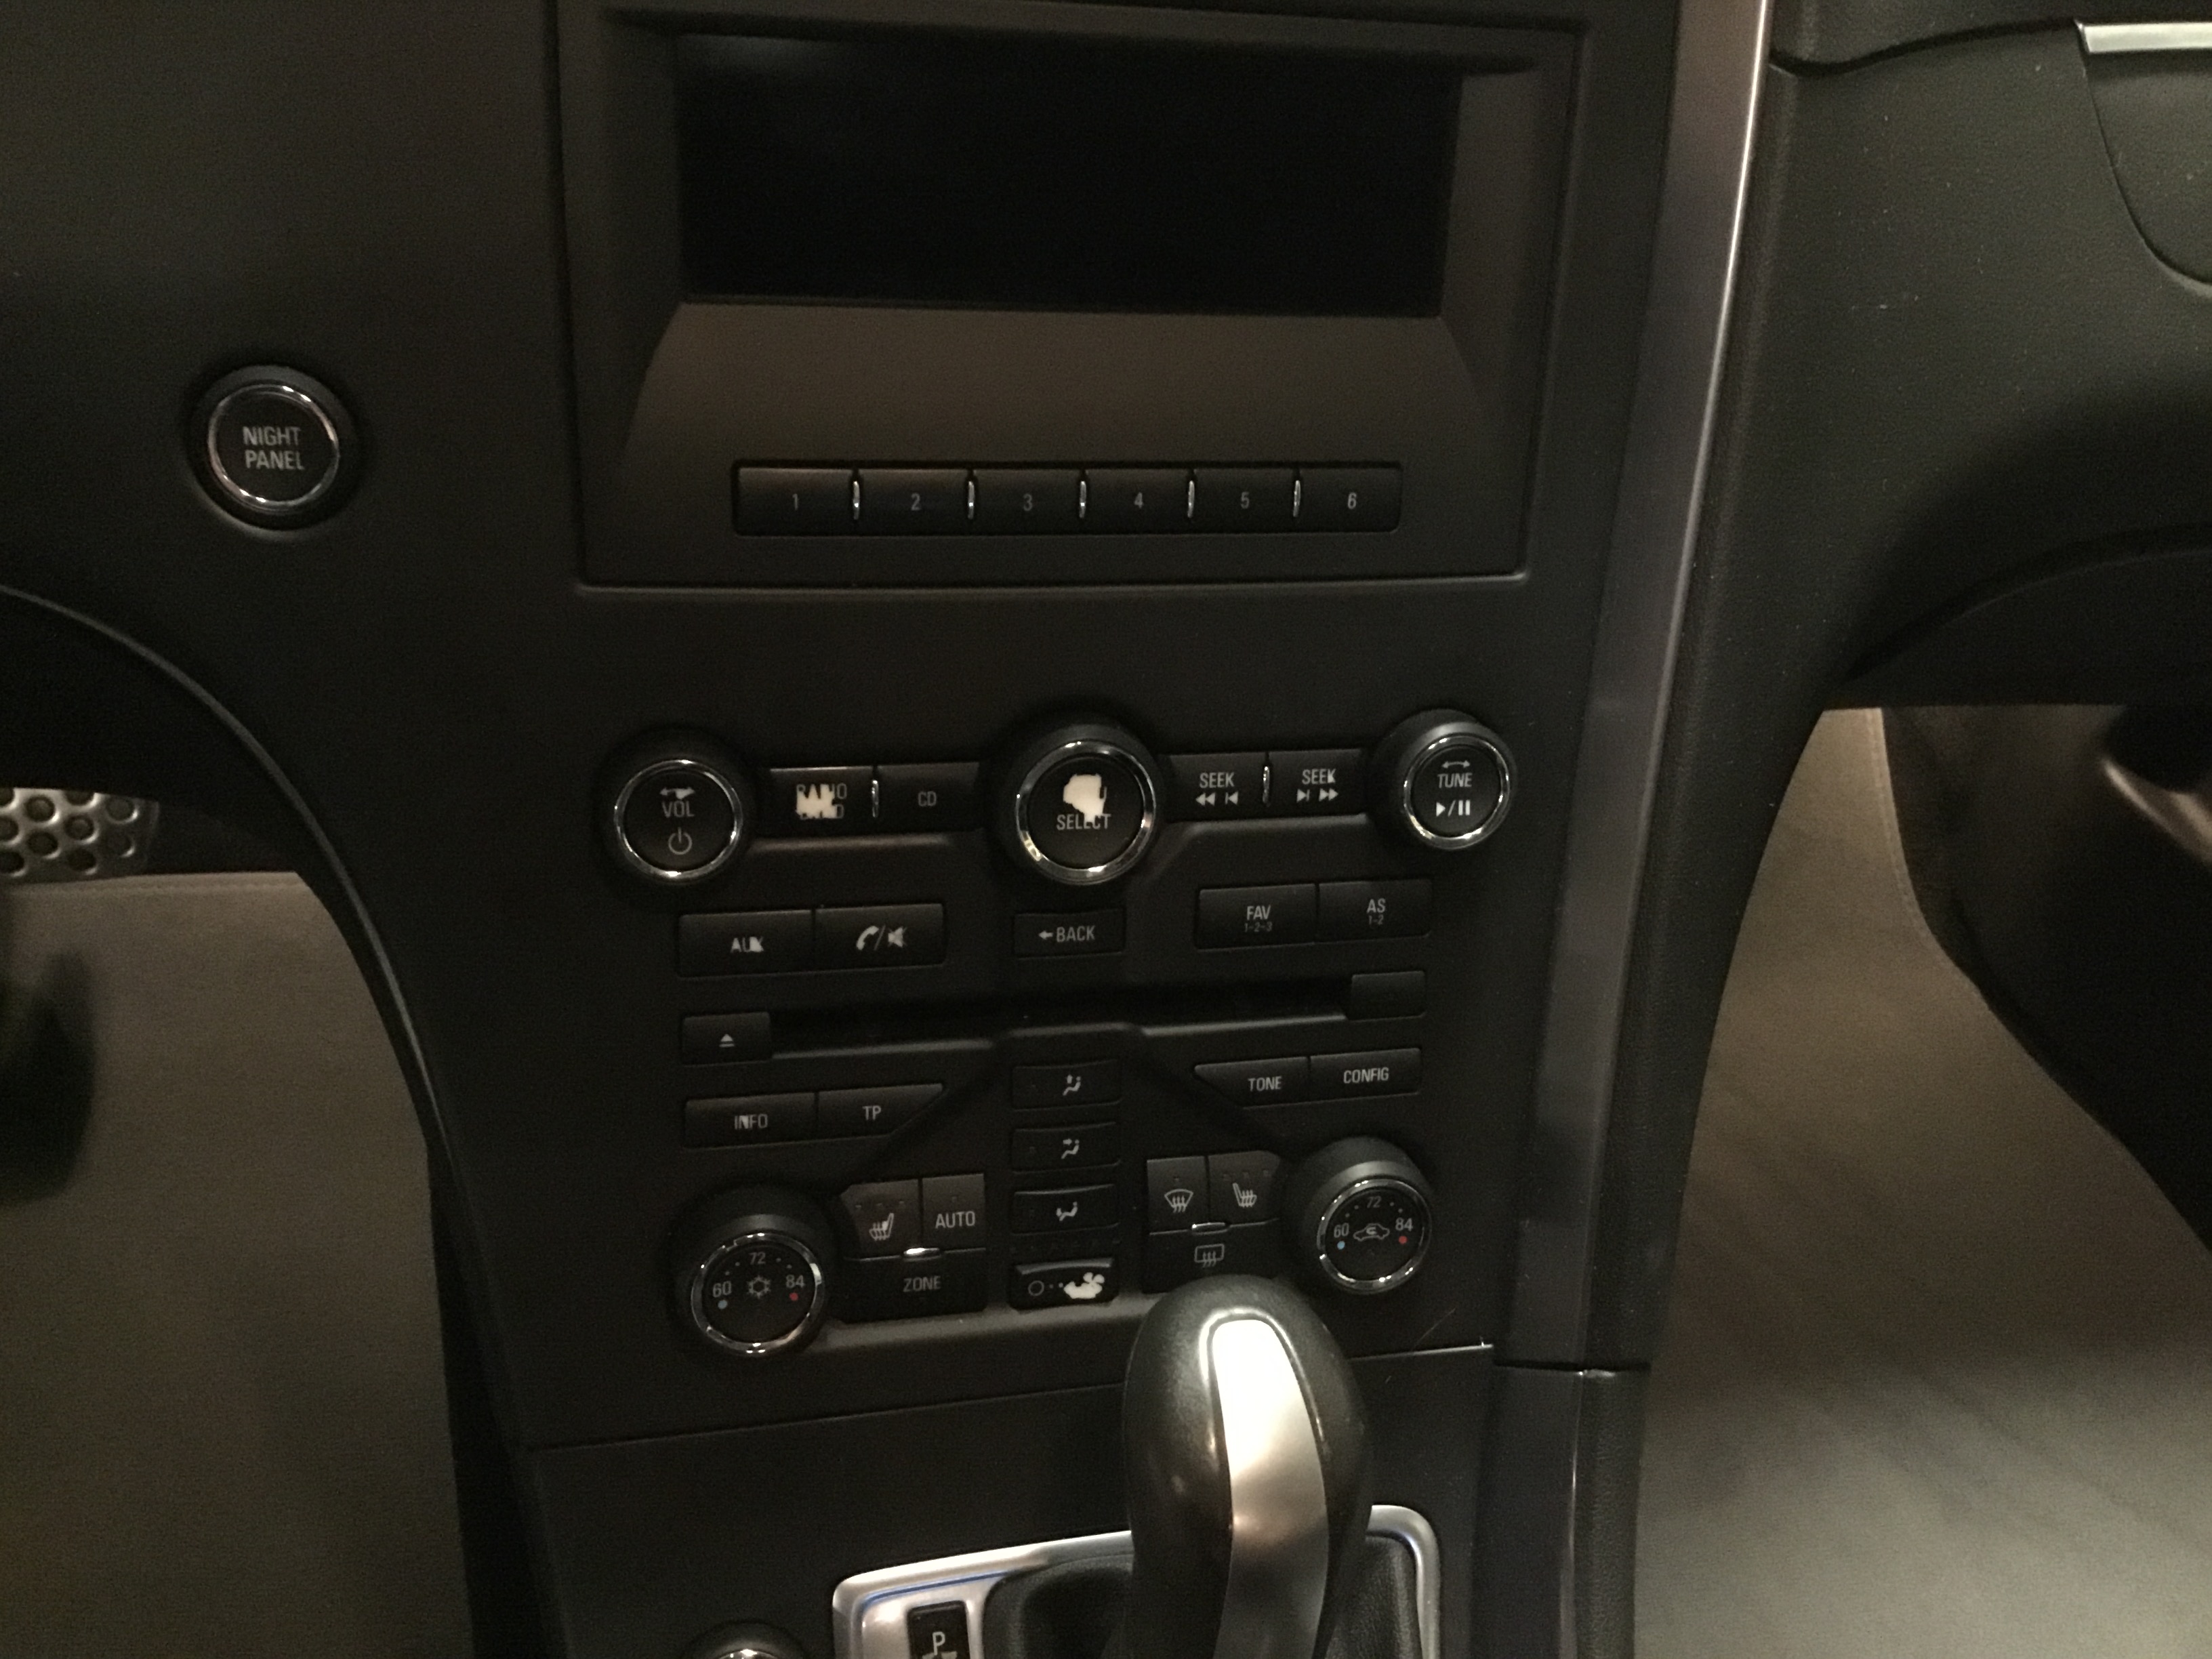
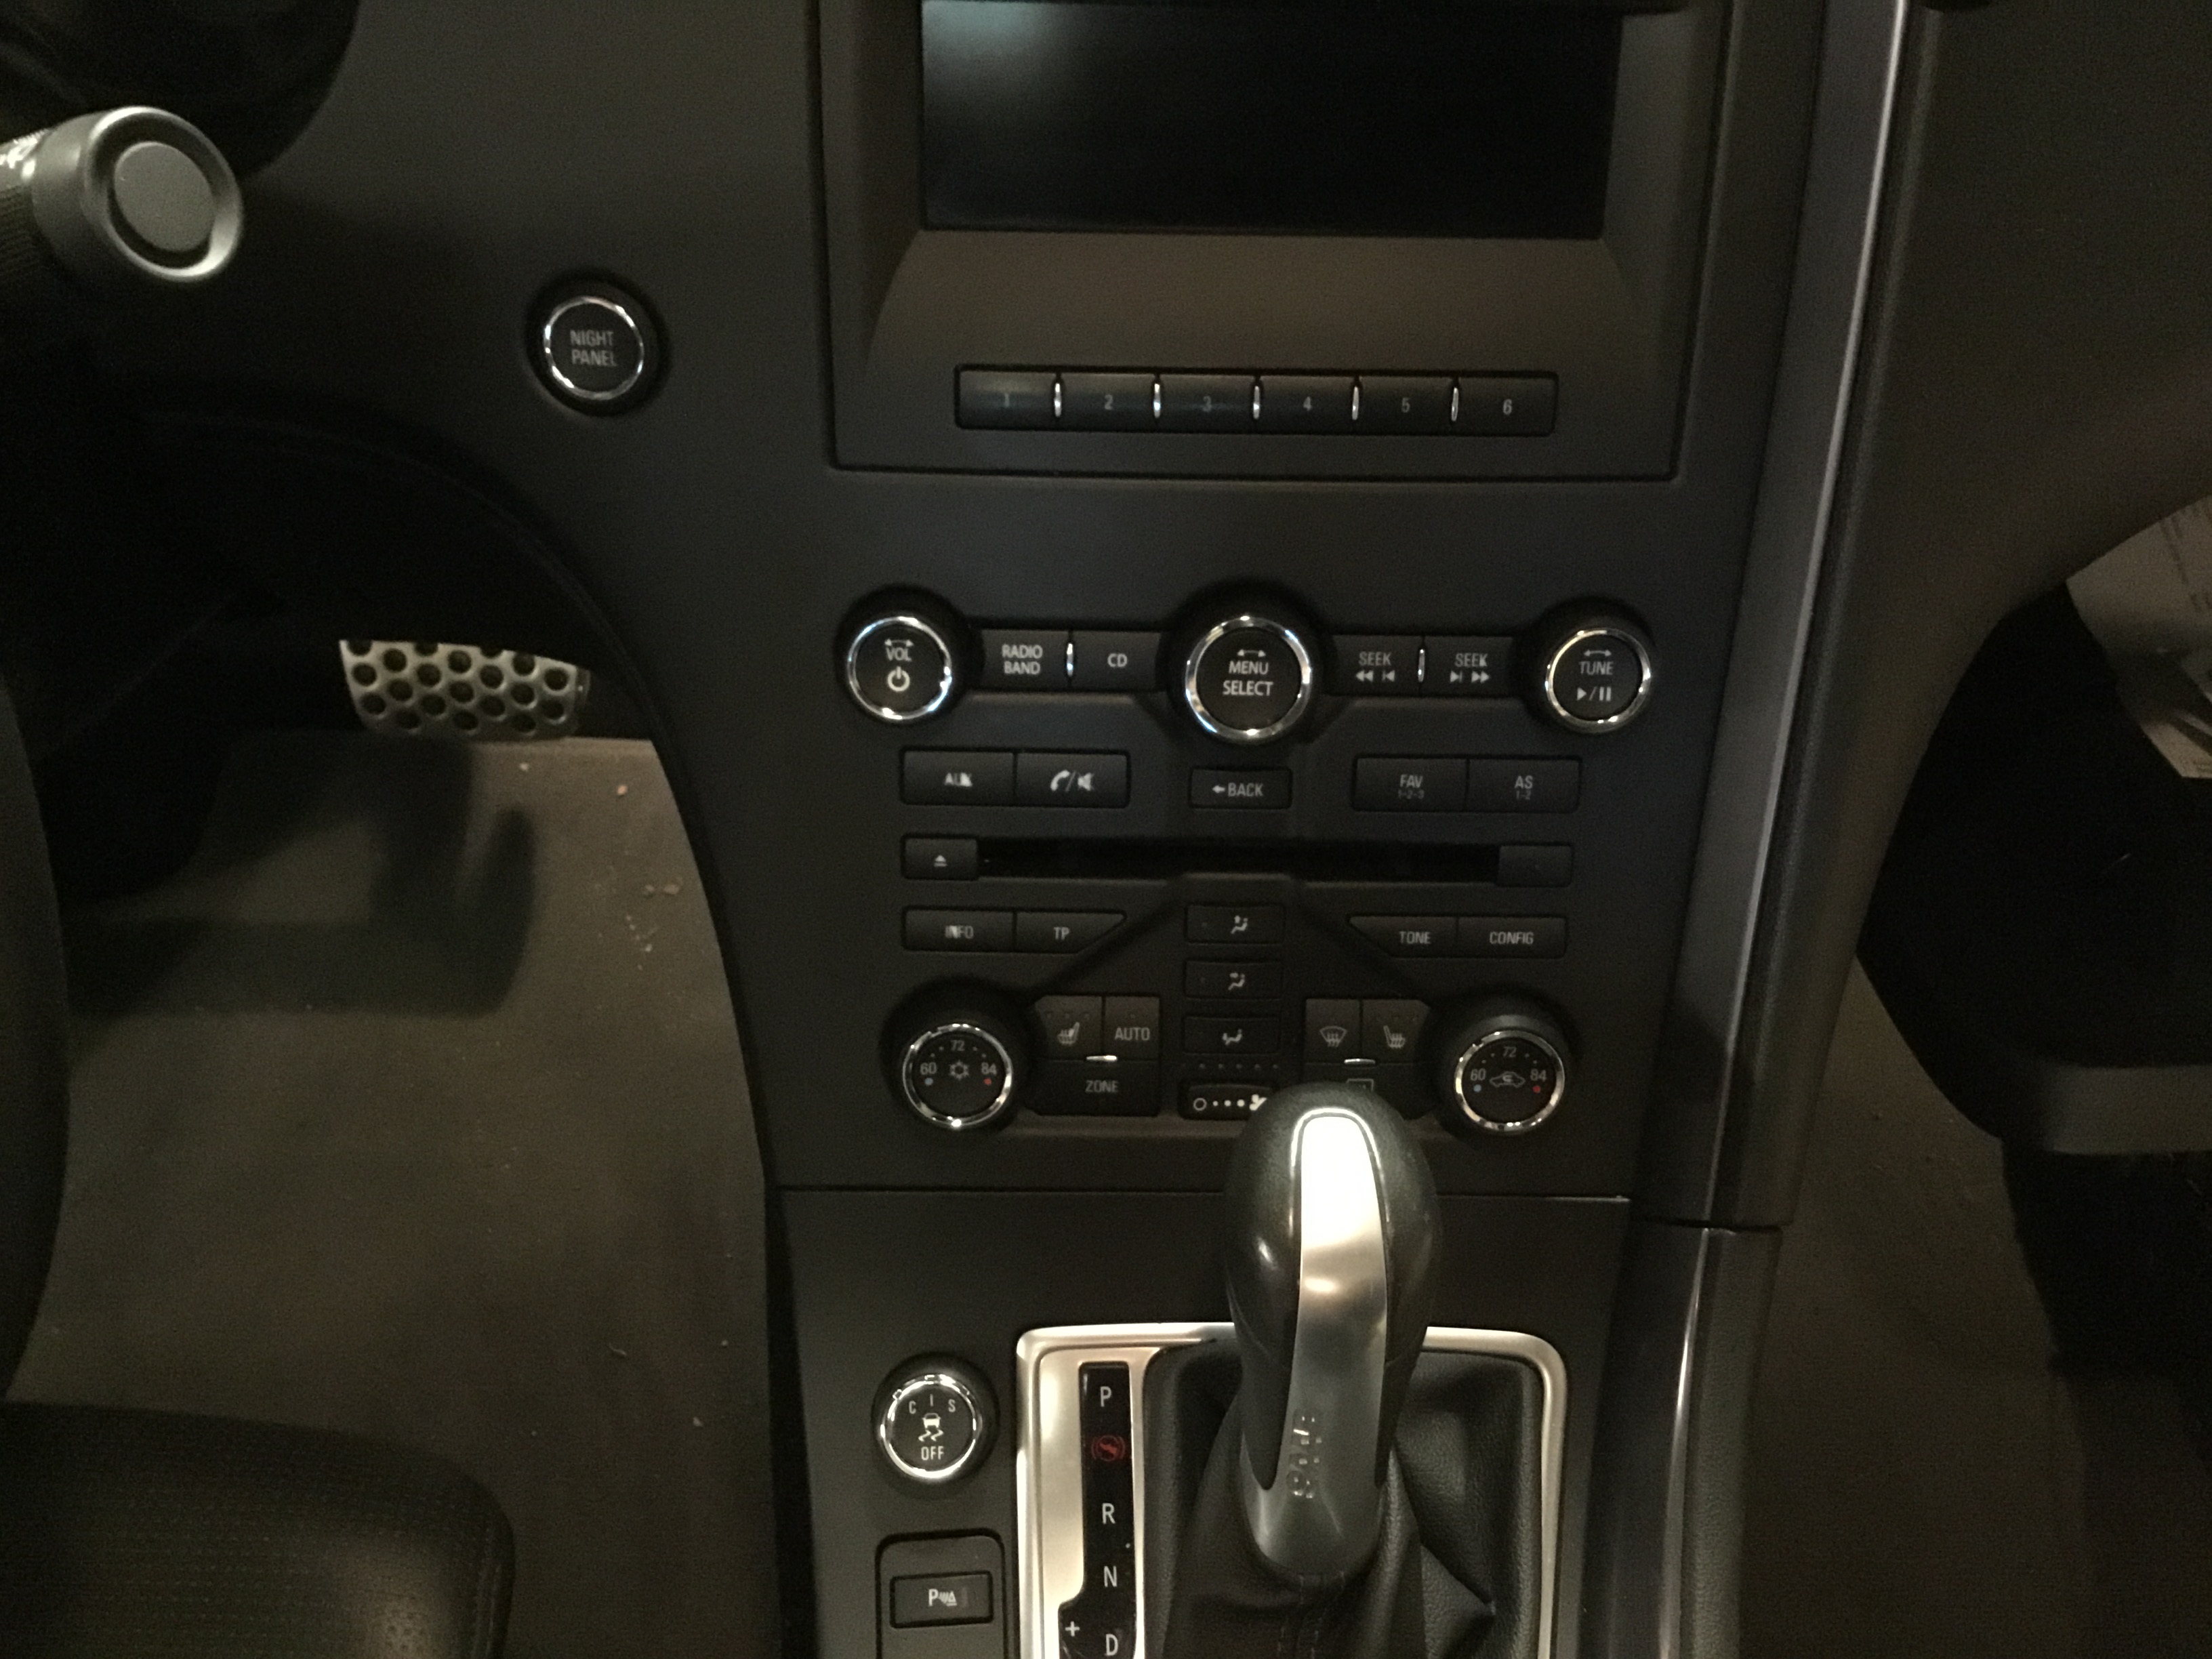
Inside, the buttons on the infotainment and/or HVAC systems often peel away from years of use.  Rumor has it that hand lotions, etc accelerate that peeling away process.  Checking around, it looks like the buttons cannot be purchased separately.  They are only available by ordering the whole center console panel.  And those panels differ by option.  Base models don’t have heated seats, so they get their own panel.  Cars with heated seats get another version, and cars with both heated & ventilated seats get yet another… guess I shouldn’t be surprised Saab went out of business should I?  Instead of adding or subtracting a $0.50 button, they had 3 different versions of a $300 panel…

IMG_1583

Looking around the internet, I stumbled across some naked women  a guy who offers decals for the worn buttons.  At first, I had my doubts… I mean, decals?  But those who bought them swore by them (not at them)!  I reached out and found out he didn’t offer an NG 9-5 version, but did offer them for the 9-4X?!?  So I decided to give it a try.  My lovely wife Tamara gave me a hand, since I’m about as steady as an alcoholic in withdrawals.  We cleaned up the button faces with rubbing alcohol and carefully applied the decals.  I’ve got to be honest, it looks pretty good!  And much better than worn off buttons…

IMG_1629

Next up was what my brother Jake and I routinely refer to as “Stage 0 weight reduction”.  The racing scene is big on reducing weight, but I’m not a fan of pulling out huge pieces of my car.  But a crappy dealer badge and lame-o license plate frame?  Good riddance!  I took a piece of dental floss and carefully worked it behind the badge, cutting through the adhesive, until the badge fell off.  A little bit of 3M adhesive remover and the residue was gone too.  Next up with the plate frame.  Sounds simple, right?  It was.  I unbolted it and unceremoniously tossed the frame and badge into the trash where it belonged.


With the license plate off, I could see that the plate mounting brackets both front and rear were looking pretty rough.  The galvanized portion was corroded, and the threaded portions were rusty.  Since I’m not interested in rust running onto my license plate, or worse yet, my paint; I decided to order up new mounting brackets.  Thankfully they are still available.  To make sure the new ones would hold up, I coated them in a zinc-rich primer and then after that dried, coated them with an industrial grade paint.  There will be no rust on my watch!


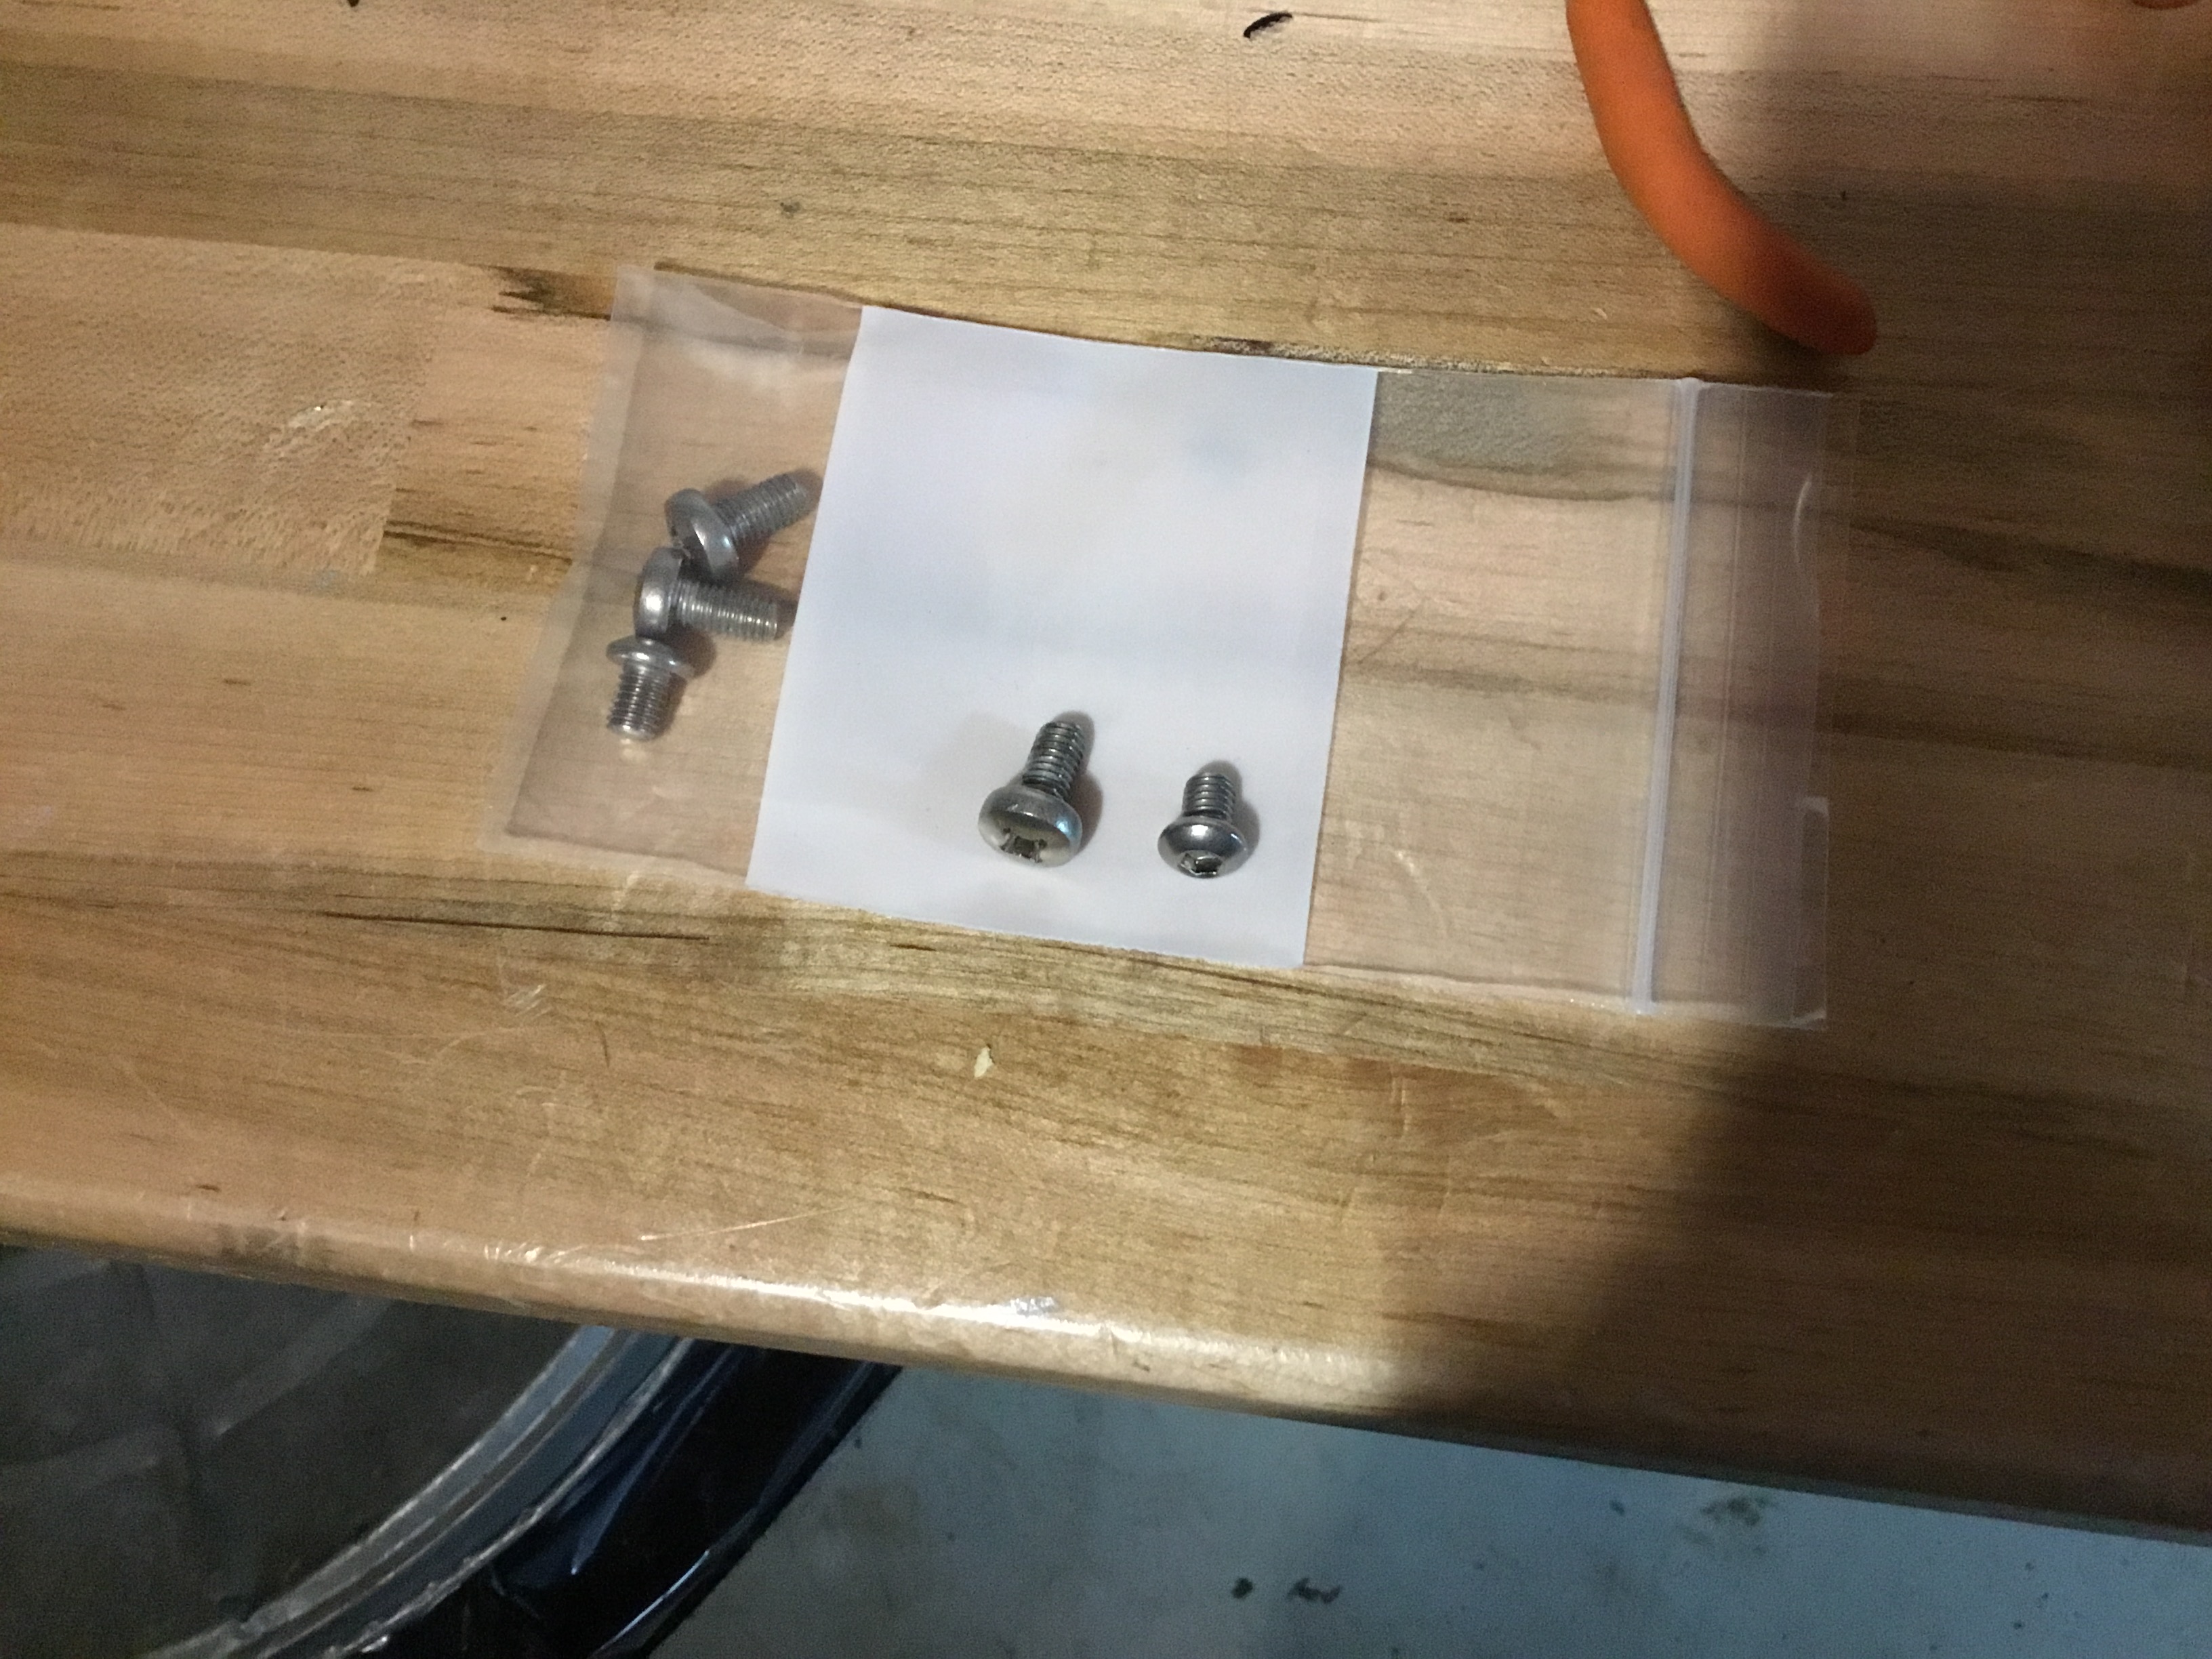
While going to remount the plate, I noticed the screws the dealer used were way too long, and actually pushed into the paint?!?  Is there anything those guys didn’t screw up?  So I jumped online again and found some much shorter button head M6 screws.  Made of stainless steel, of course.  And these don’t dig into the paint!  What a novel idea…

IMG_1613

Next up was a coolant hose.  Despite the dealer’s “964-point inspection”, my car’s turbocharger coolant return hose was touching the turbo heat shield upon delivery.  And while the hoses come with a foil heat shield of their own, it’s not rocket science to see that the heat will eventually damage the hose if it’s in direct contact with the shield.   So I ordered up new hoses.   And the hard piped portion was all rusted up too, so I ordered a new one of those as well.  So I unbolted the old pipe and bolted up the new one (it comes with a new pipe-to-turbo bolt too), along with the new rubber hoses.  I topped up the coolant and added a bottle of Royal Purple’s “Purple Ice”.  No, this isn’t P Diddy’s newest cocktail beverage…  it helps release surface tension in your coolant, allowing it to pull heat from the combustion chambers much more effectively.  Given how octane sensitive these engines are, every little bit helps.  I checked to make sure the new hoses were NOT touching the turbo shield, and called it good.


So, not bad for a couple hours of work.  Unlike Hillary’s emails, I was able to make most of my problems go away without having to murder anyone.  But given how notoriously hard these cars are to work on, I’m not ruling it out!  After all, I can just say the Devil made me do it!

IMG_1776

Baby needs a new pair of shoes!

From the minute I saw our “new-to-us” NG 9-5, I knew I was going to have to do something about the rims.  Since the dealer felt that showing the rims was a highlight, I swear it actually scared off potential buyers!  Seeing a nice car with rashed up rims tells a story, which is:  the driver cannot drive for squat!  I’m guessing the last owner lived in the Boston area (where the dealer was), and hit every curb in the entire city.  If Paul Revere tripped over it, this guy rashed a rim on it.  No way I could live with this, so the homework began.

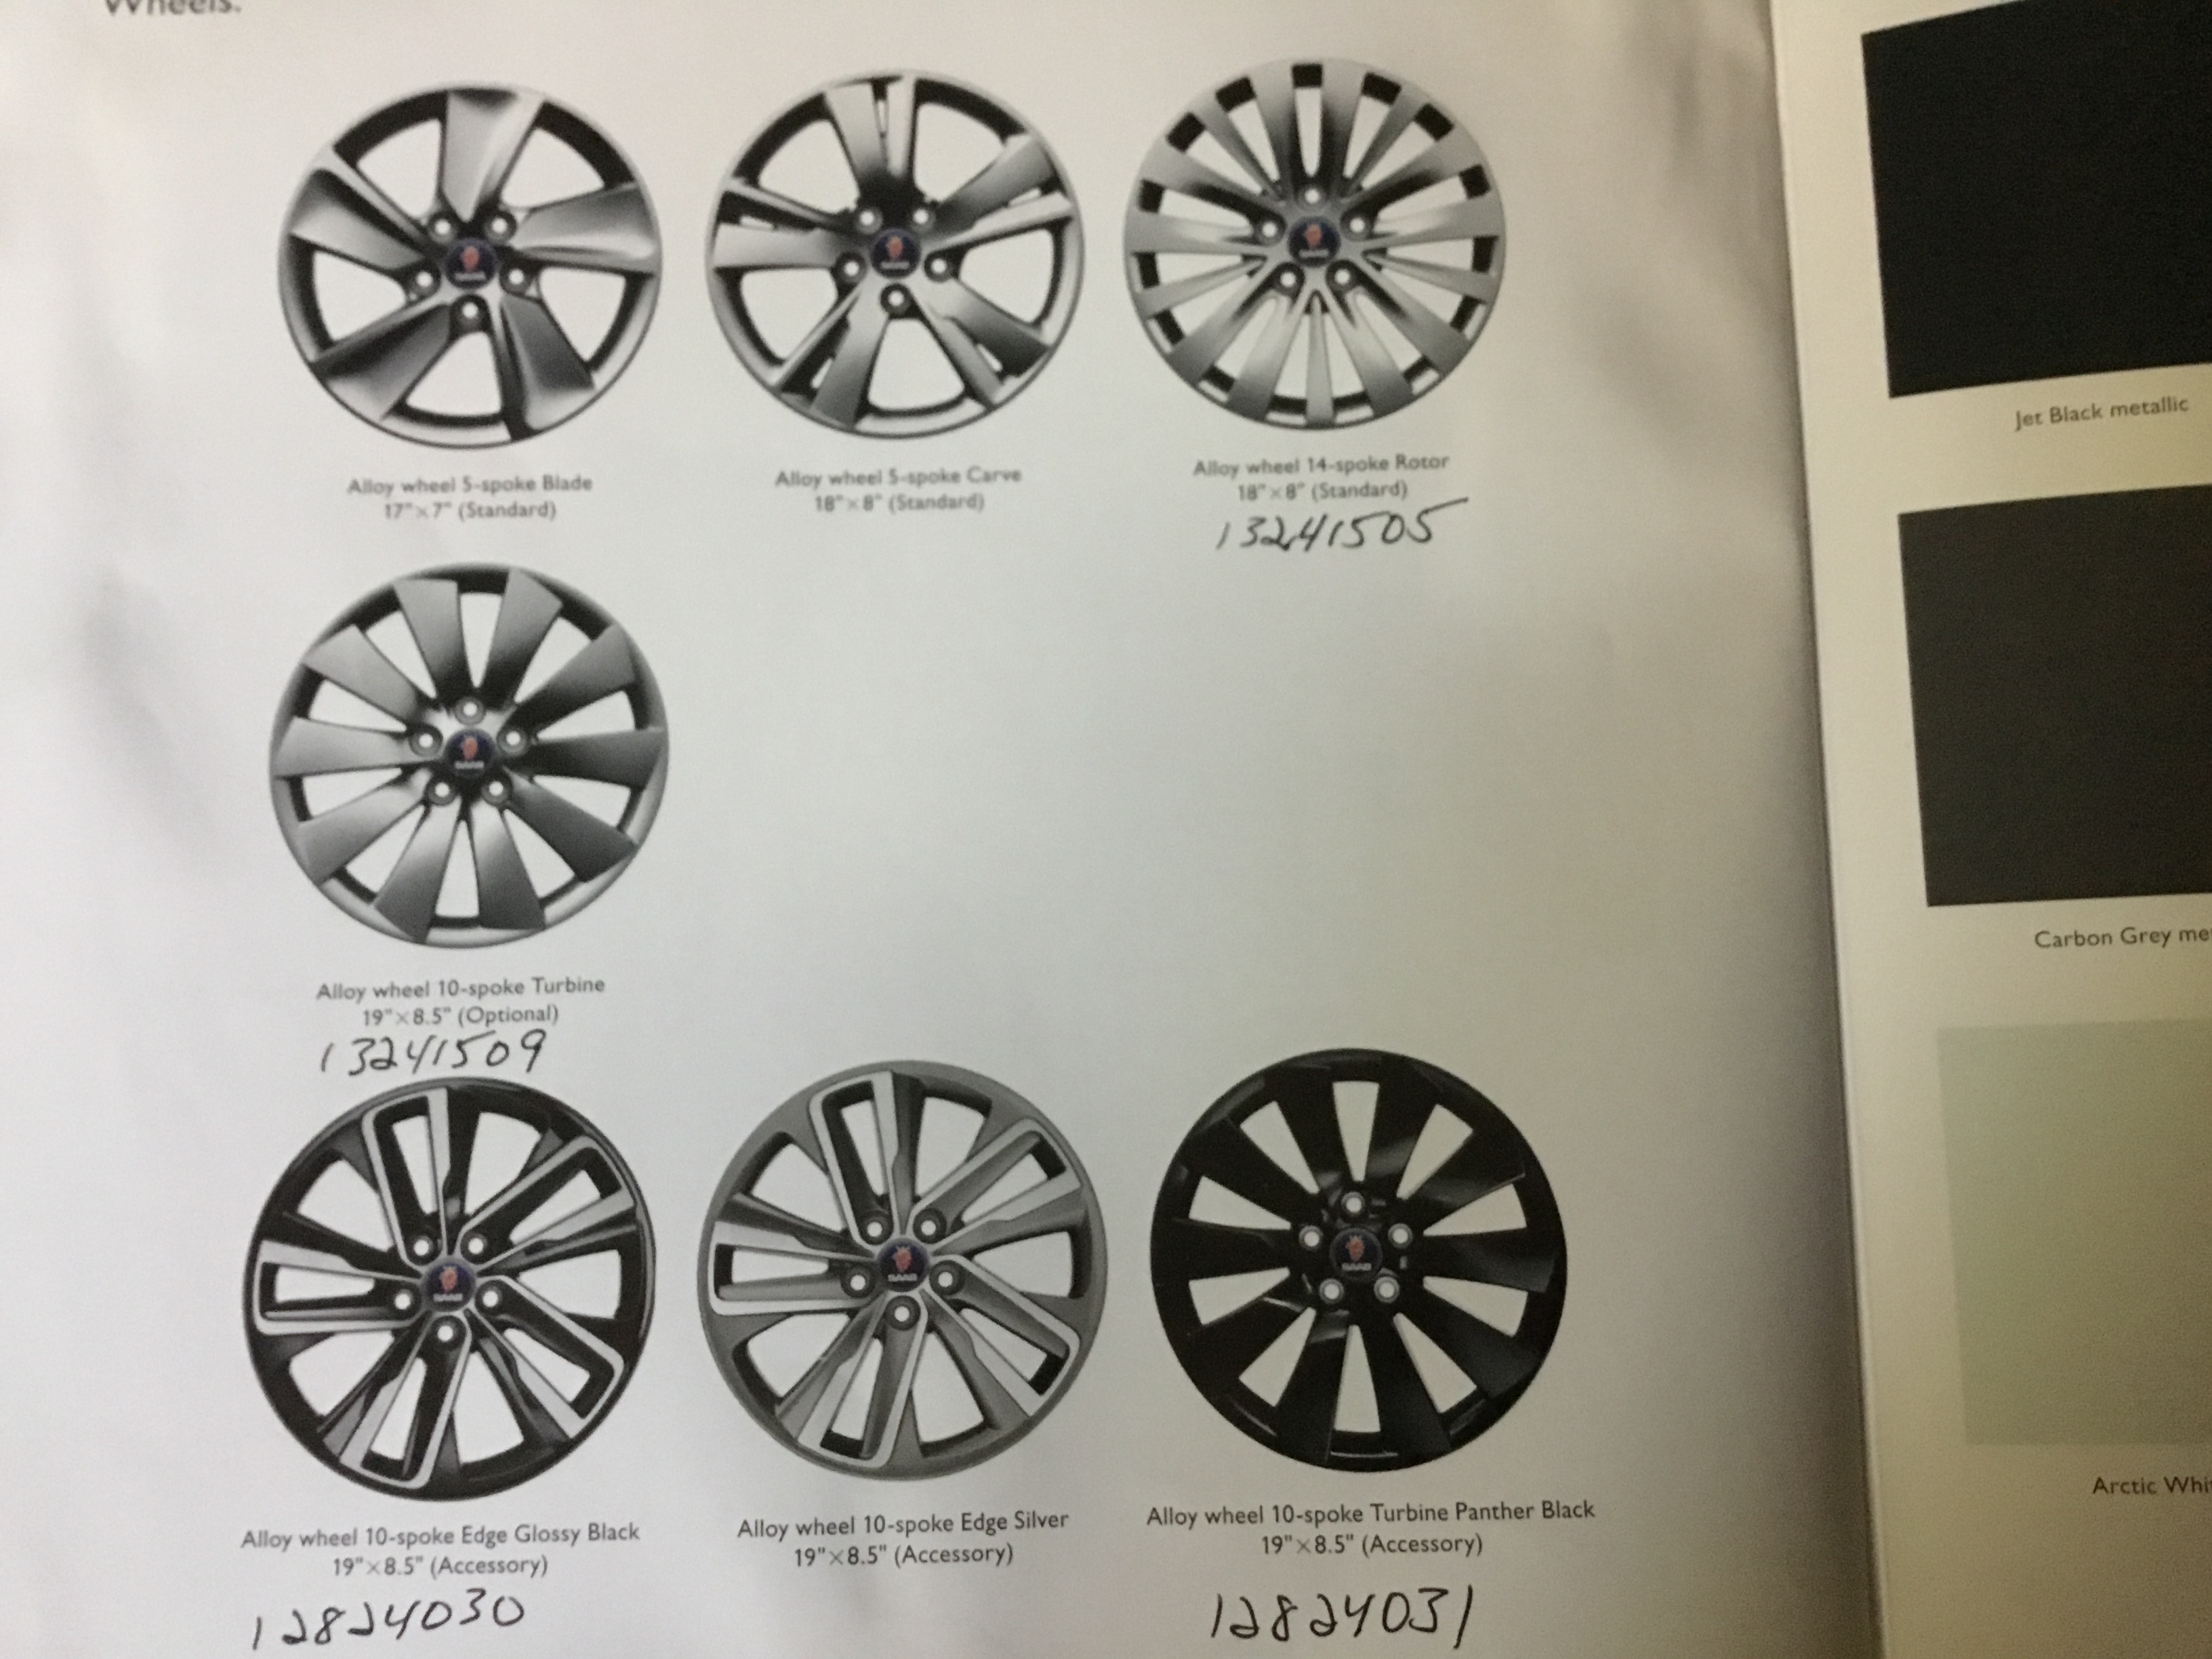
Turns out that Saab offered quite a few rim choices for such a low-volume car:

  • 17″ “Blade” rims on the Turbo4
  • 18″ “Carve” rims on the Turbo4 Premium and Turbo6
  • 18″ “Rotor” rims on the Aero
  • 19″ “Turbine” rims as on option on the Aero
  • 19″ “Panther Black Turbine” rims as an accessory
  • 19″ “Edge Glossy Black” rims as an accessory
  • 19″ “Edge Silver” rims as an accessory

IMG_1678

Crazy, right?  Our Aero came with the 18″ “Rotor” rims which look great, and since the roads are marginally paved here in New England, are the best choice (instead of 19″ rims) since we have so many frost heaves and potholes.  One of my brothers tried huge rims with tiny sidewalls a few years back.  They lasted about 2 months…!  The tiny sidewall simply offered no shock protection for the rim.  So after shopping around, Mitchell Saab down in CT had the best price on the new rims.  Plus, I could pick them up without having to pay shipping to boot.  And since you’re buying new rims, it only makes sense to buy the new TPMS (Tire Pressure Monitoring Sensors) and new center caps as well.

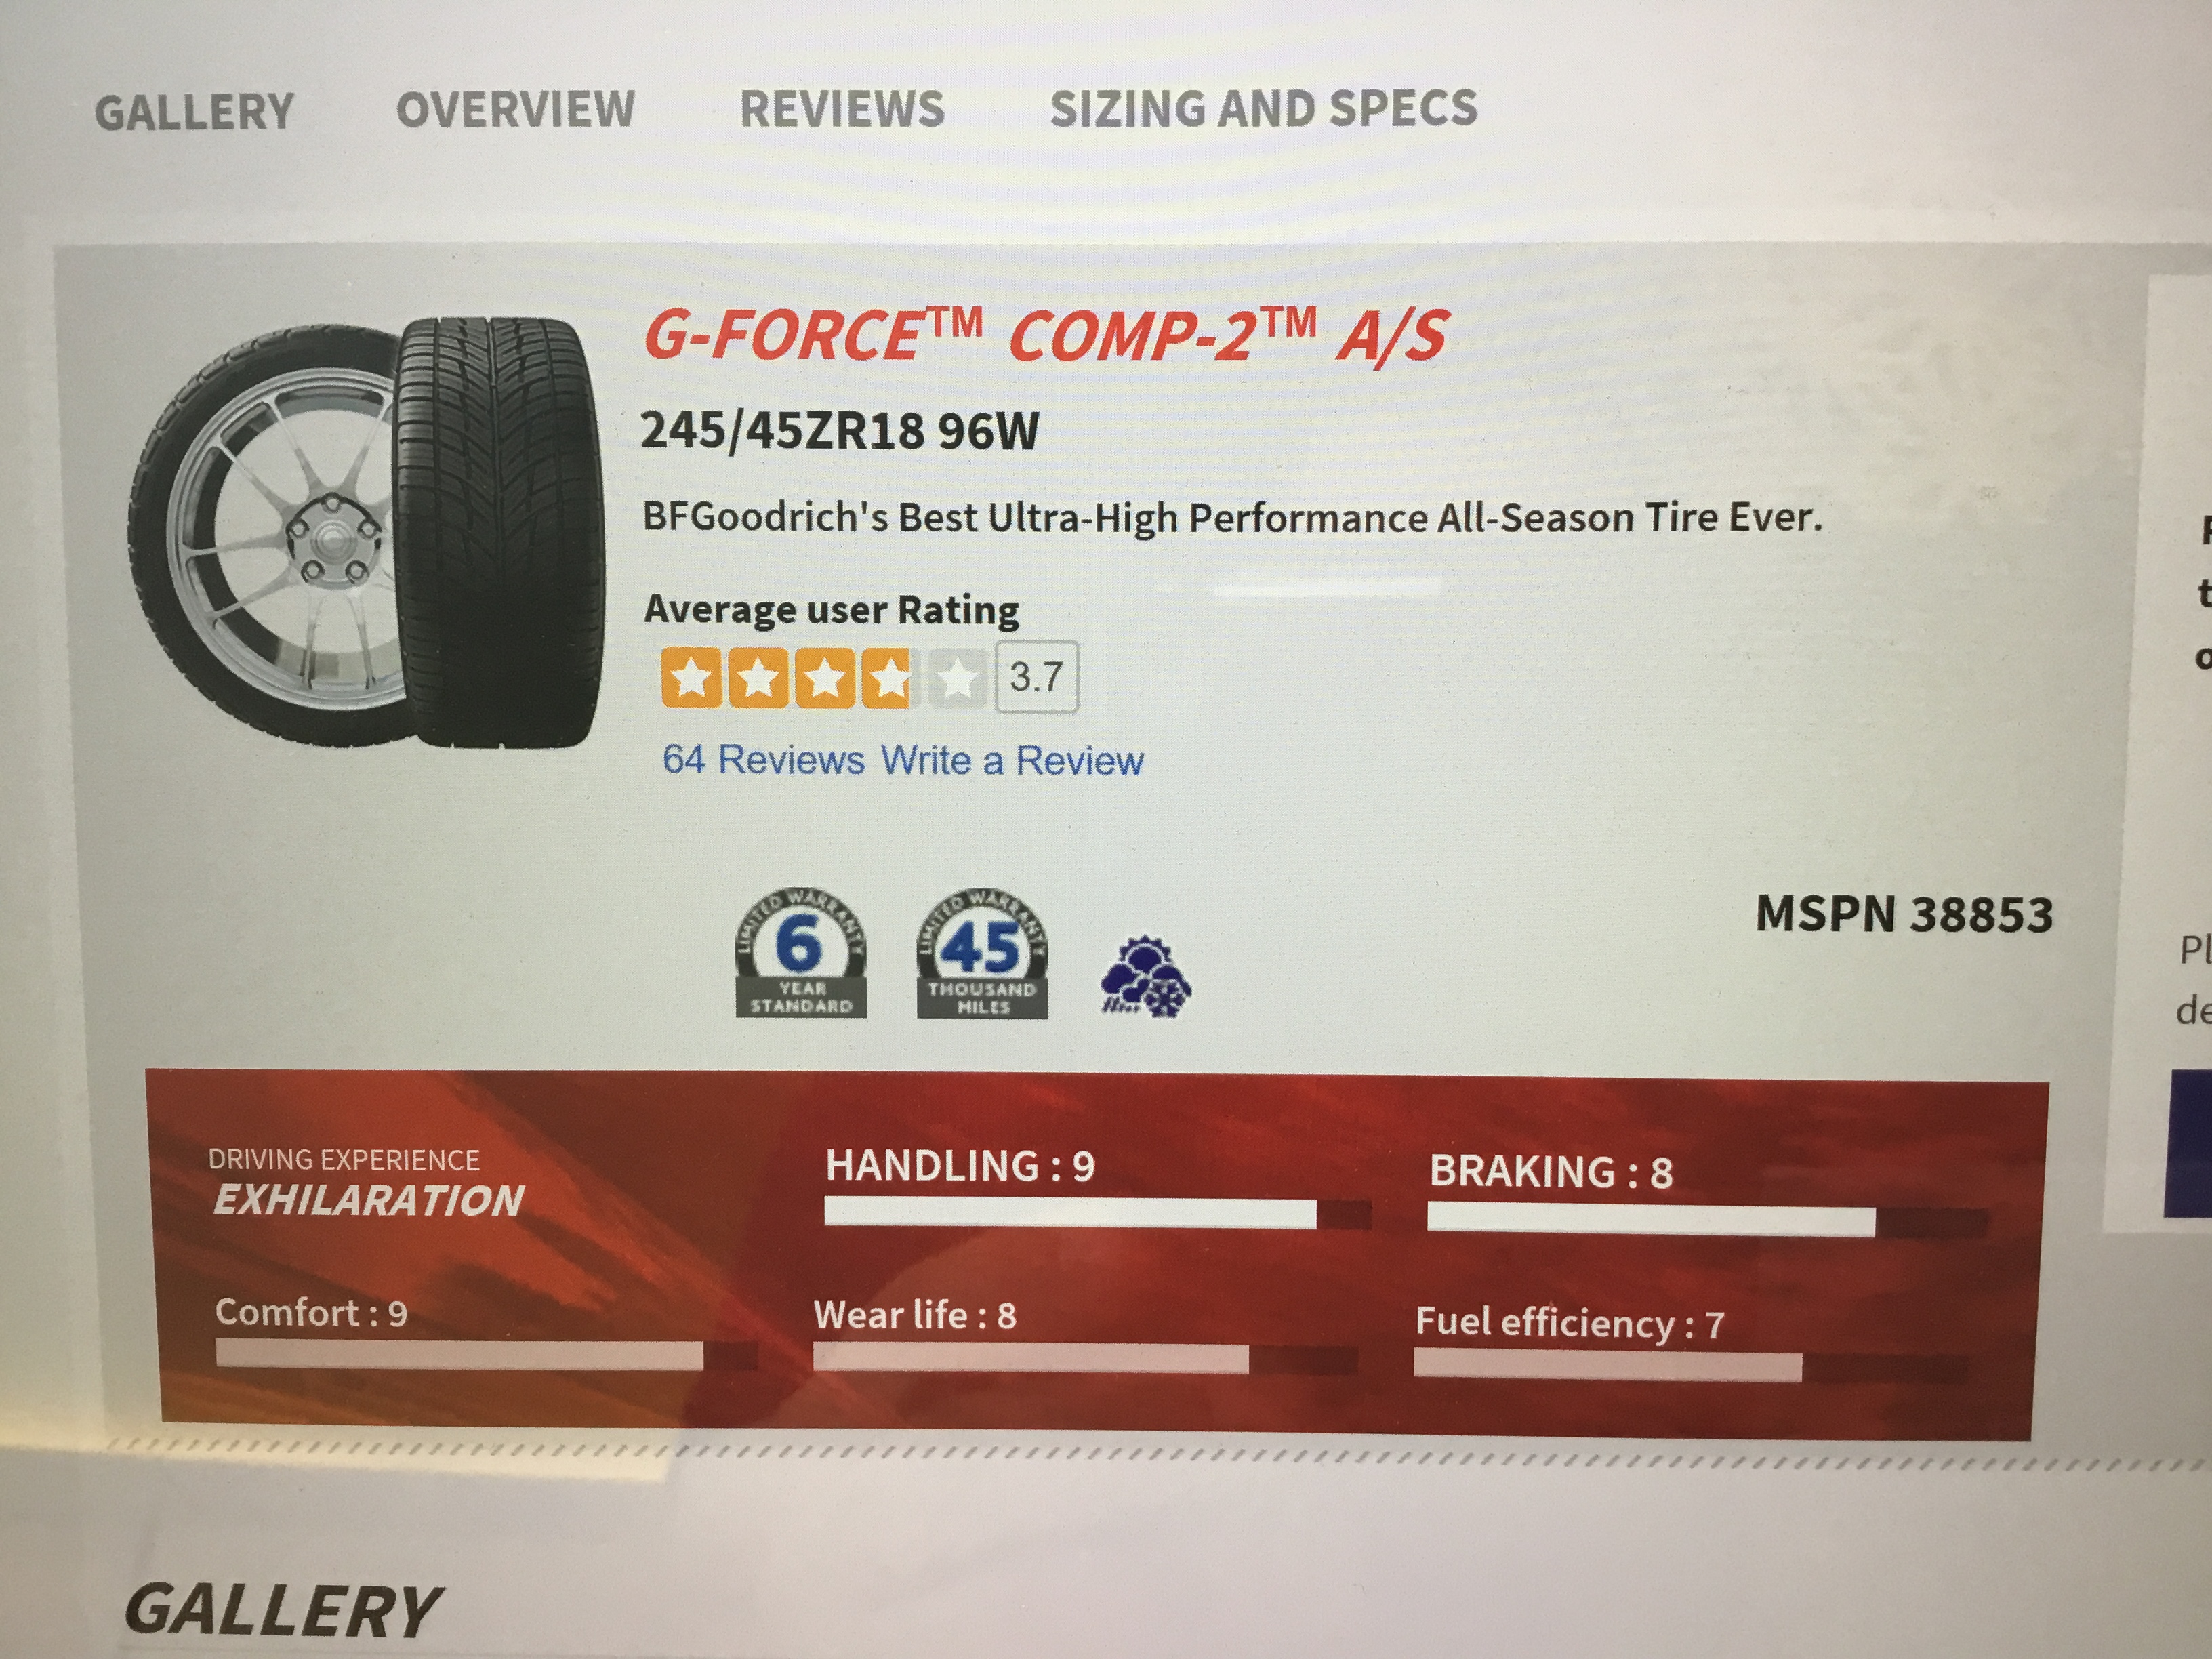
With the new rims in hand, I gave them a nice coat of Griot’s Garage One-Step Sealant inside and out.  I’ve found this makes keeping them clean much easier!  Every spring, just give them a good cleaning, reapply the sealant, and you’ll keep them looking good.  With that done, it was time to shop for tires (since the car came with (3) 245’s and (1) 225!).  Since the car will see little to no snow, I could focus on performance.  But it still needed to be able to handle a little snow or rain on rare occasion.  After a bunch of research, I settled on the what Tire Rack described as “The Peoples Champ”, the BG Goodrich Comp-2 A/S.  Goodrich says its their best ultra high performance all-season tire ever, so I figured I would give it a try.  I’m hoping for great handling with the ability to keep you on the road should you encounter a little snow or rain.

IMG_1679

Getting good tires is nice, but a basic spin balance job can leave you with weird vibrations or inbalance.  The OEM’s all use road-force balancing, but not every tire retailer has the ability to do that unfortunately.  Since Hunter makes the best road force balancing machine, the Elite, I went onto their website to learn more about it.  According to Hunter, the Elite will:  “detect non-balance, radial-force related problems associated with tire uniformity, tire and rim runout, wheel to balancer mounting errors and improper bead seat of tire to rim.”  As you can see, it’s really the only way to go.  More info about the Hunter Elite road force balance is here:  http://www.hunter.com/wheel-balancers/road-force-elite

Luckily, local tire retailer C&R Tire in Worcester has the new Elite, and after a little haggling, I got the price of the tires close to the online stores.  So I dropped off the brand new OEM rims and a couple of hours later they were ready to go.  I bolted them up, applied some anti-seize to the bolts,  and torqued them to 111 ft/lbs.  I scrubbed down the new wheels and tires and applied a coat of Griot’s Garage Vinyl & Rubber dressing to the tires (superior to Armor All by a mile).  It made the car look virtually new again!

So another project done and in the books.  Or more accurately, in the checkbook!  Unfortunately I don’t get to be like Commander Data and take a local casino for a ride to pay for it…!


Shedding some light (bars) on the situation

Well, as part of my negotiation tactic to drive down the buying price of my 2011 NG 9-5 Aero, I was smart enough to check out the rear LED light bar before agreeing on the final purchase price.  As expected, the light bar didn’t work… at all.  Usually these get dim, or one side goes out, but this one was dead across the board.  The LED strips at the top of the tail lights are supposed to go through the LED light bar which would then connect both sides.  Since bringing it home, I decided to tear into this before even getting the car officially on the road (I have plates & insurance, but not yet inspected).  Oh, and in typical NG 9-5 fashion, this light bar is “NLA” (no longer available) from Orio (Saab Parts).  Get used to seeing “NLA” a lot if you decide to buy a late model NG 9-5 or 9-4X…

First step is to take apart the inside of the trunk (or “boot” for my UK readers) lid to get access to the light bar.  There are a bunch of plastic push pins that you need to pop the center up on first, then pull out the clip.  The trunk lid handle has a couple of small metric screws that hold that on, so take that off next.  The lid latch cover just pulls off, so piece of cake there (don’t think I’ve ever said that working on a Saab before!).  So after taking those items off the trunk lid liner just falls down.

Next up, you have some 10mm nuts to take off (five, to be exact).  Then there are two spring clips, one at each far end of the LED light bar.  You have to carefully press the middle metal portion together.  Taking this thing out is not rocket science, but I can’t remember the last time I was this nervous working on a car (well, besides compressing the front springs on the Sonett…) because I know this part is nowhere to be found if I break it…  Lastly, unplug the one electrical connection that powers the light bar.  Thankfully, things went according to plan and the bar came out with no drama.  Now was the time to clean behind where the bar is normally installed.  It will be full of crud, so I cleaned it up with Griot’s Garage Speed Shine.

I packed up the bar with as much care as I can muster.  Picture needing to ship the Holy Grail, and you have the idea!  I sent it off to Dave at http://www.ledfix.com.  For under $200, he will take it apart, replace the circuit board and/or bad leds, and FedEx it back to you.  He turns it around in 48 hours after receiving it, so when it arrived back from him I carefully reinstalled it.  Reinstallation was drama free as well (phew!).  Before and after pictures show the freshly refurbished light bar was back in business!

One item off the checklist, but certainly not the last…!

Oops, I did it again…

If you’ve been following along on my What On Earth Is A Sonett blog, you know how crazy a complete tear down and rebuild of a Vintage Saab can be.  The last thing I need is another crazy car that needs special attention and has limited parts availability.  But, here we go again (on my own?)…

With the lease coming up on Mrs. Sonett’s 2015 Volvo XC60 T6 AWD, we decided that although the Volvo was nice, it just didn’t feel the same way the Saab did, and that we definitely missed our last 9-5.  Our last one was a 2011 Turbo4 Premium in Java Metallic, and I later found out it was 1 of 3 ever made.  That’s like trading in a Michael Jordan rookie trading card…only the trading card is probably worth more money…  The Turbo4 Premium had the 2.0L turbo four cylinder and FWD.  By getting the Premium package, you got a double panoramic moonroof, power/memory/heated leather seats, upsized 18″ “Carve” wheels, a standard 6-speed auto transmission, headlight washers, power folding and auto-dimming mirrors, keyless passive entry with remote start, and front/rear park assist.  It’s quite a bit of stuff over the standard Turbo4 9-5.  Our car also had the Harmon/Kardon stereo upgrade.

So, great car right?  If so, why did we trade it in?  Well, we thought we were going to need the room of the SUV and we knew we needed all wheel drive (given how our town does not plow the roads…).  So we traded it in towards the Volvo but we knew it was time to go back to Saab.  And since my work gives me an SUV anyway, the room issue was no longer a problem.  So the search began!  But this time, we wanted to get the top of the line model:  the Aero.  Given how  much equipment the Turbo4 Premium had, what was the big deal?  Well, going to the Aero gets you a bunch of stuff above and beyond the Turbo4 Premium:

  • 300 HP Turbo6 engine
  • XWD system with eLSD technology (can move torque between the left and right rear wheels automatically, in addition to front/back)
  • Adaptive and self leveling Bi-Xenon headlights with signature LED lighting
  • Active damping suspension with 3 modes (Comfort/Intelligent/Sport)
  • Bolstered sport leather seats with Aero-specific steering wheel
  • Larger 13.3″ front and 12.4″ rear brakes
  • Paddle shift

We found one on Long Island (we live in Central Mass) and so we took a 3 hour trip to check it out.  Owner was nice but the car needed more TLC than we were looking for so we left empty handed.  My brother warned me about cars from Long Island… and he was right.  But as fate would have it, I had watched the car we ended up buying on Autotrader for some time.  Boston Volvo wanted more for this car than any other NG 9-5 online, but I didn’t know why.  The online pictures looked awful!  The rims were curb rashed, stereo buttons worn away, there were finger prints all over the center console, etc.  I was floored that they put pictures up without even detailing the car?!?

About a week later, I ended up at a jobsite not far from Boston Volvo, so I decided to venture over and see what the deal was.  It was so much nicer in person!  It was my luck that the online pictures were so bad, otherwise this car would have sold for sure.  It drove nice, and the salesman made the mistake of telling me they had it in stock for a while, and that cars that sit on the lot for 90 days go to auction…!?!  That was all the ammo I needed.  I showed their sales manager the curb rashed rims, the non-functioning rear LED light bar, the mismatched tires, etc and I proceeded to lowball the hell out of him.  He was shocked, I guess he’s not used to buyers offering a third off their cars prices… but this car wasn’t moving.  He knew it, and I knew it.  I ended up coming up a few bucks to finalize the deal, paid my astronomical $400 documentation fee, and Mrs. Sonett drove it home.  And this is where our story begins…